Tuesday, November 29, 2011

Peppermint Marshmallows


Chocolate? Peppermint? It must be Christmas. Yahoo! The season is here and it's one of my favorites. And on the subject of favorites this here recipe is one of my kids' favorites. Seriously, as far as they're concerned, it's not Christmas if I don't make these. One year I hadn't planned on making them and I almost had a revolt on my hands. But luckily, these are very easy to make and I was able to quell the revolution. So, difficult? No. A bit time consuming? Yes.  There are a lot of steps and there is some waiting time, so I'll dispense with a lengthy introduction and get right to it. . .

Here's what you need: unflavored gelatin, granulated sugar, light corn syrup, salt, peppermint extract, candy canes and powdered sugar. You'll also need semi-sweet chocolate chips and shortening. (But I forgot to show them. Oops!)


Start by crushing up 5 or 6 regular sized candy canes. I "triple bag" them and use a meat tenderizer. I highly recommend the "triple bag", those little shards can get sharp and easily cut through just one bag. Then you have a real sticky mess on your hands.


There you have it, crushed candy canes. Cover them until you need them.
They tend to absorb moisture out of the air and start to clump up quick.


Next, set a 8x12-inch pan on a rimmed cookie sheet and dust liberally with powdered sugar. Get a good layer going. You shouldn't be able to see the bottom of the pan.
I really like the disposable pans from the Dollar Store for this. Just makes it easy!


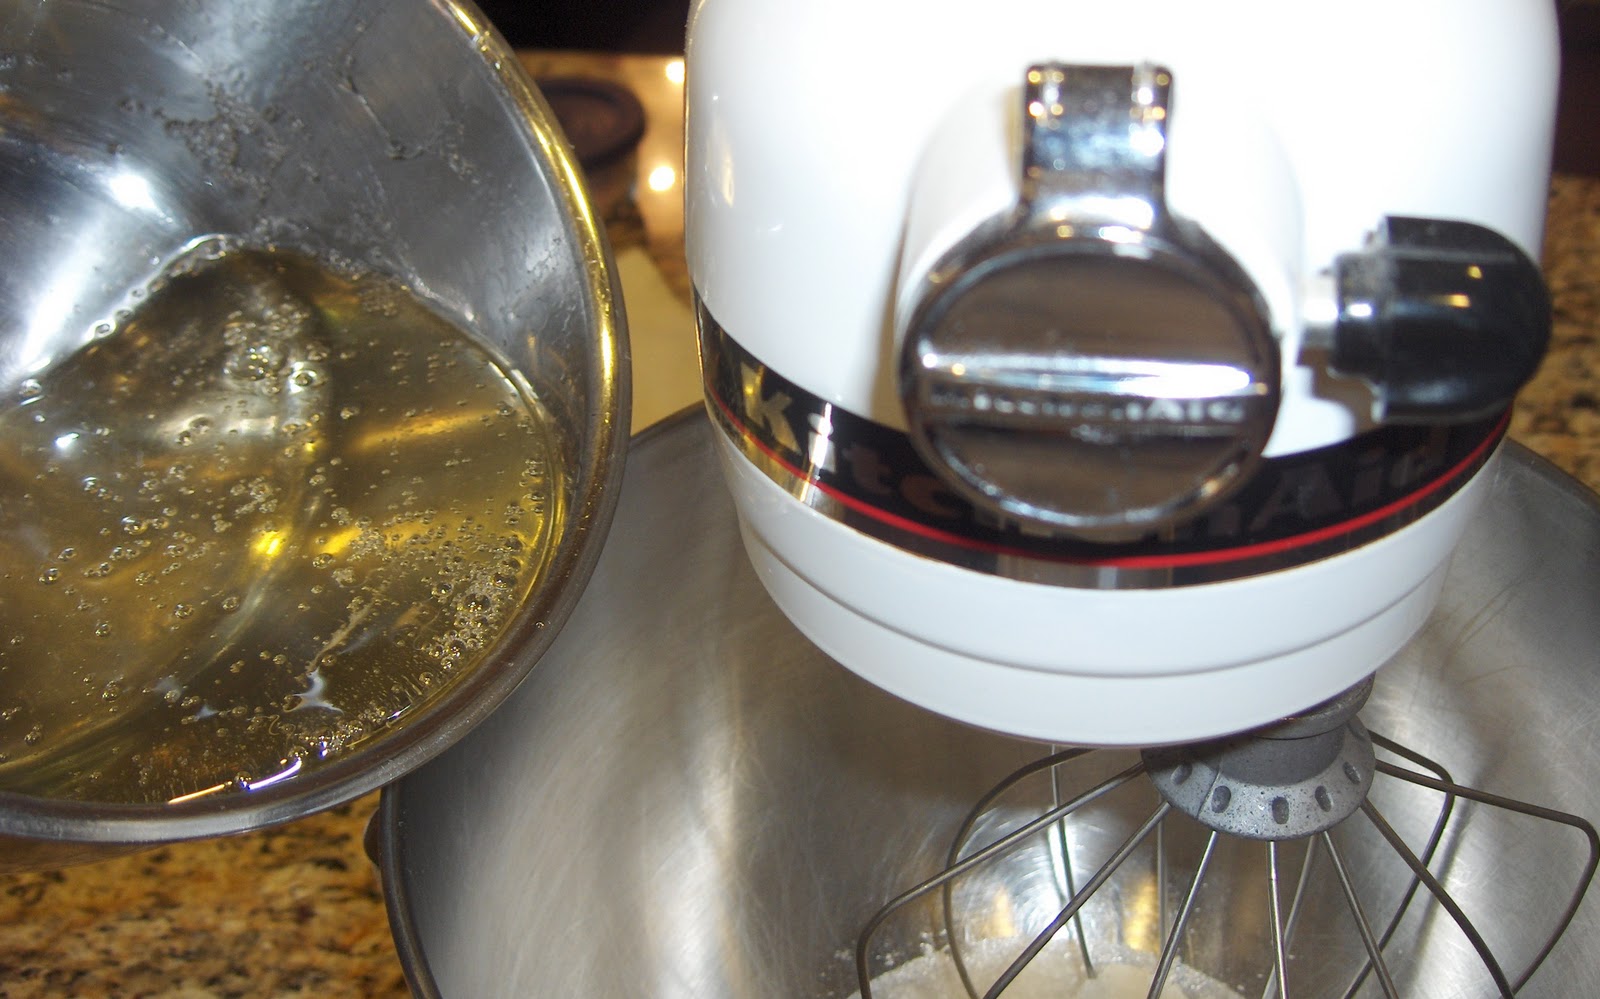
Put the gelatin and 1/2 cup water in the bowl of a stand mixer and let set for 30 minutes to soften.


While the gelatin is softening get your sugar syrup going. Add the sugar, another 1/2 cup water, corn syrup and salt to a saucepan. Stir over low heat until the sugar is totally dissolved.


Wash down the sides of the pan with a wet pastry brush.
Don't skip this or you'll get grainy sugar syrup.


Clip on a candy thermometer, raise the heat and cook to the "firm ball stage" (244°F) without stirring. This may take a while. Be patient! I love this digital thermometer. If you are going to do any serious candy making, I highly recommend it.


When the sugar reaches 244°F immediately remove it from the heat. Fit your mixer with the whisk attachment and turn it on low. Slowly pour in the hot sugar, running it down the side of the bowl, avoiding the moving whisk. If it hits the whisk it will fling hot sugar all over. Not fun!


Once the hot sugar is all in and has melted the gelatin, set the mixer on high and whip it until its thick, white and almost 3 times its original volume. This is not thick, white or tripled in volume.


This is. Yea. Add the peppermint extract and beat to incorporate.
Add the crushed candy cane and stir until evenly distributed.


Pour the mixture into your prepared pan. The candy cane will turn it a lovely shade of pink with little red flecks. I love it!


Wet your hands and pat it evenly into the pan.


Dust the top with more powdered sugar and let set out overnight, uncovered, to dry out.


Turn it out onto a cutting board. You may need to loosen it up a bit from the sides of the pan.


Use a very sharp knife to cut 1-inch squares. If you have trouble with the knife sticking, run the knife under hot water, dry it off and then try cutting.


Toss the squares with more powdered sugar.


And set them on a sheet to dry out the edges. I let them dry overnight again. That pile there in the corner is all the "scraps". I like really straight sides so I trim off the edges before cutting into squares. I have no trouble finding someone to scarf up those scrap pieces.

You could stop right here and you'd have lovely peppermint marshmallows. Perfect for a creamy cup of hot chocolate. I save a few for that. But let's take some to the next level: Chocolate Dipped.


Once the marshmallows have dried and the edges are no longer sticky, toss them around in a strainer, set over a big bowl, to knock off any excess powdered sugar. If there is loose sugar left on then the chocolate won't coat evenly.


Line them up on a silpat mat.

Melt the chocolate and shortening together until smooth and liquid. I have this fancy schmancy chocolate melter thingy but you can use a glass bowl and the microwave. Microwaving and stirring 15-30 seconds at a time until it's melted. Plop a marshmallow into the chocolate.


Quickly flip it over to coat.


And lift it out with a fork. Tap the fork several times on the side of the bowl to knock of any extra chocolate. Then use a skewer to slide it off onto the silpat mat. Sprinkle lightly with any extra leftover crushed candy cane.


Yummy, chocolate dipped, home made, peppermint marshmallows. Great for eating. Great for giving. You're going to love 'em!


Chocolate Covered Peppermint Marshmallows
Adapted from Martha Stewart's "Homemade Marshmallows"

2-1/2 T. unflavored gelatin (approx. 3 envelopes)
1-1/2 C. sugar
1 C. light corn syrup
1/4 t. salt
1T. peppermint extract
4T. crushed candy canes, plus extra for decoration. 
      (approx. 5-6 regular sized candy canes)

3 C. semi-sweet chocolate chips
3 T. vegetable shortening

Powdered sugar for dusting

Set an 8x12-inch pan on a rimmed cookie sheet and dust generously with powdered sugar. Set aside. Combine gelatin and 1/2 cup cold water in the bowl of a stand mixer fitted with the whisk attachment. Let stand 30 minutes.
Combine sugar, corn syrup, salt and another 1/2 cup water in a small heavy saucepan and place over low heat. Stir until sugar has dissolved. Wash down the sides of the pan with a wet pastry brush.
Clip on a candy thermometer and raise the heat to high. Cook without stirring until it reaches 244°F (firm-ball stage). Immediately remove pan from heat.
With mixer on low speed, slowly and carefully pour syrup into the softened gelatin. Increase speed to high and beat until mixture is thickened, white and almost tripled in volume, about 15 minutes. Add peppermint extract, beat to incorporate. Add crushed candy cane pieces and mix briefly to distribute.
Pour mixture into prepared 8x12 pan. Pat smooth with wet hands. Dust with powdered sugar and let stand overnight, uncovered, to dry out.
Turn out onto a cutting board and cut into 1-inch squares and toss in a bowl with more powdered sugar.

Microwave chocolate and shortening on high for 30 seconds. Stir. Continue to microwave, 15 seconds at a time, stirring in between until chocolate is melted. Dip marshmallows in chocolate and sprinkle tops with crushed candy cane.

Makes about 40 marshmallows

Friday, November 18, 2011

Pecan Tart


My absolute favorite pie of all time is Pecan Pie. Hands down, no debate, end of story. I inherited an adoration of Pecan Pie from my mom, a southerner. But really, it's probably the most traditional of all the Thanksgiving fare. Pecans are one of the only major nuts crops native to North America and they were a major diet staple for Native Americans as far back as the 1500's. Seriously, way back. It's a pretty safe bet that somewhere on that first Thanksgiving table there were pecans. They are the most American of nuts. 

Now, as much as I love Pecan Pie, and I really really do, I will admit that it can be a tad on the sweet side. Alright, who am I kidding, it's seriously sweet. Maybe it has to do with the sugar, brown sugar and corn syrup. Maybe? Hmm? I'm not sure. For those new to Pecan Pie, it can be a bit daunting. All that sugary gooeyness oozing out beneath the pecans. So, In order to appeal to a wider audience, I've made some slight modifications to the traditional pie and gone with a tart. I started with a regular old Pecan Pie recipe, but cut the quantities for the filling in half. I kept the original quantity of pecans but chopped them up. I know it looks pretty with all the whole pecans on the top but I think the tart turns out crunchier and is easier to cut into clean pieces if the pecans are chopped. What you end up with is all the flavors of traditional pecan pie but with equal amounts of pecans and filling. Give it a try.

Here's what you need: Your favorite recipe for a one-crust pie. (I used half of Gesine's "Perfect Puff" found here and here, seriously, it's my new favorite crust recipe.), sugar, brown sugar, salt, dark corn syrup (Please use the dark!), vanilla, melted butter, eggs and chopped pecans. You'll want to melt the butter and beat the eggs (separately of course) before you get started. Oh and you'll need an extra, separate, beaten egg white.

Line a 9-inch tart pan with the pie crust and trim the edges even with the pan.

Brush and bottom and sides of the crust with the beaten egg white. This creates a moisture barrier and prevents your crust from getting soggy.

Put everything else, except the pecans, in a bowl and mix it up good. It's really easier if you beat the eggs first. I didn't. Sometimes I do things the hard way. Sometimes I'm stubborn about it. Sometimes.

Here's what it looks like all mixed up. Make sure the egg is all mixed in, it can be stubborn. Mmmm, sugary.

Spread the pecans evenly over the bottom of the crust. The recipe calls for 1 cup but I used a bit more just to fill every space. As far as I'm concerned you can't have too many pecans, use your judgement.

Set the tart pan on a rimmed cookie sheet, just in case you get any overflow, and pour the filling over the pecans. Don't worry. Those little suckers will float to the top.

Bake in a 350°F oven for 30-40 minutes until the top is brown and the filling is set.

Here is why you use the sheet pan. You don't want that sticky mess on the bottom of your oven, do you?

Let the tart cool to room temperature, cut a serve. I like Cool Whip, 'cause I'm one of those "If it ain't Cool Whip, it ain't Thanksgiving" people. For reals, I like whipped cream, and it would be a nice compliment, I just need Cool Whip at Thanksgiving. 
Try my Pecan Tart, it's a small tweak on tradition.

Pecan Tart

Pie crust for single crust 9-inch pie
1 beaten egg white

1/2 C. granulated sugar
2T. brown sugar
1/4t. kosher salt
1/2C. dark corn syrup
1/2t. vanilla
3T. butter melted
2 eggs beaten
1C. chopped pecans

Make pie crust and line a 9-inch tart pan with removable bottom.
(This can be done a day or two ahead)

Preheat oven to 350°F
Brush inside of pie crust with beaten egg white.
Mix together sugar, brown sugar, salt, corn syrup, vanilla, butter and eggs. Sprinkle pecans evenly over bottom of unbaked tart shell. Set the tart pan on a cookie sheet and pour syrup mixture over the top of pecans.
Bake in preheated oven for 30-40 minutes until top is browned and filling is set.
Let cool completely before serving. (Can be refrigerated overnight.)

Tuesday, November 8, 2011

Sweet Taters


For most of my childhood sweet potatoes resided in the gross column. Seriously, I wouldn't touch 'em. Gross, yuck, nasty, disgusting. Luckily, my mom didn't fix them often. Almost never. And there in lies the reason for my childhood disgust. My only experience with sweet potatoes, up until my late teens, was "Candied Yams" served once a year, at Thanksgiving. If you grew up in the 60's or 70's I'm sure you know what I'm talking about. Mushy orange orbs of squash, swimming in an overly sweet concoction of orange juice and brown sugar, topped with broiled marshmallows. If you were particularly unfortunate the cook might have tossed in some crushed pineapple or worse yet, chopped nuts. 

Wait. . .
Hold on a second. . .,
I think I'm going to be sick. Deep breaths, d-e-e-p b-r-e-a-t-h-s.
OK, I'm better now.

As a kid the marshmallows sucked me in only once. What a deception. The ultimate adult betrayal. Wasting perfectly good marshmallows on this disgusting side dish. Then, to be polite, one of your parents would put some on your plate, then insist that you eat some. Betrayed again! Seriously, were they trying to ruin Thanksgiving?

Then one day, out of the blue, on an uneventful afternoon in fall, my father baked a sweet potato in the oven. A fresh one, not from a can. Hmmmm, it smelled pretty good. Then he cut it open, added a little butter and salt and ate it. Ate it for no good reason. It wasn't Thanksgiving, he didn't have to be polite. Was he crazy? What gives? So I tried some. . . and discovered that I LOVE sweet potatoes. I didn't just like them, I LOVED LOVED LOVED them. 

Loved them so much that I've been eating them, year round, since that fateful fall afternoon. Love them so much that I'm showing you not one, but two ways to fix them. Enjoy!

Roasted Sweet Potatoes (courtesy of my High School BFF Lara)
2 lbs. Sweet Potatoes, 2-3 T. Olive Oil, salt and pepper to taste.

Start with 2 or 3 sweet potatoes. I actually only ended up using two of these.
They are almost 1lb. each, big fellas!

Peel them and cut out any "eyes" or bad spots. DO NOT put the peels down your garbage disposal. Unless of course you love your plumber and want to throw a little extra work his way.

Drizzle 2-3 tablespoons olive oil on a rimmed 1/4-sheet pan.

Cut the sweet potatoes into "steak fry" sized pieces. Oh I'd say about 2-3 inches long, 1/4-inch thick and 1/2-inch wide. Be careful cutting them. They are pretty sturdy so use a sharp knife. (Again, this is just 2 of the sweet potatoes.)

Toss them around (I use my hands) in the olive oil on the sheet pan, sprinkle with a little salt and pepper, then spread them out into a single layer. Roast them in a preheated 425°F oven (yes, get it HOT) for 10-15 minutes, flip them over and go another 10 minutes or so.

You want to edges to caramelize and get brown but they shouldn't be so overcooked that they fall apart. They may stick a bit to the pan but that's OK. That's all the yummy natural sugar that puts the "sweet' in sweet potatoes.

Simple and delicious. In heavy rotation around our house.

Mashed Sweet Potatoes
2 lbs. Sweet Potatoes, 1/4 C. unsalted butter, 1t. salt, pepper to taste.
Additions (see below).


Put a steamer basket (this cheap-o one has served me well for many years.) in the bottom of a 3 qt. saucepan and fill with water just until it comes through the bottom of the steamer basket. Put the lid on and heat to boiling. Keep the lid on.

Start off again with two sweet potatoes. These were about 2-1/2 lbs. They almost didn't fit in my pot so I would recommend 2 lbs.

Peel them and cut off any weird stuff.

Cut them up into 1-inch-ish cubes. You don't have to be real precise here, just approximate uniform sizes so they cook evenly.

Dump them into the steamer basket and put the lid back on. Steam them for 20-30 minutes until "fork tender". Meaning if you stick them with a fork, it should easily go all they way through the chunk, if you meet with any resistance then give 'em another 5 minutes or so. Start checking them after about 15 minutes.

Perfect! I really prefer to steam, rather than boil, sweet potatoes. It tends to leach out less of the good stuff. You don't want to loose all that sugar and those vitamins.

Strain off any liquid and carefully pull out the steamer basket. (I used tongs.)
Add 1/4 cup (1/2 a stick) of butter and 1 teaspoon of salt. Then mash them up. Don't use a food processor, it will make them runny. You could use a hand mixer but I prefer a good old fashioned potato masher. Gets the job done and I like the texture.

Now I like them with just butter and salt (and a few chopped toasted pecans, YUM!) but if you want to take it to the next level there are all sorts of things you can do. Just start by with small quantities, adding as needed and tasting as you go. 

Here are just a few suggestions:
• Add 1/4 cup orange juice for a hint of orange.
• To sweeten things up, add 2-3 tablespoons of maple syrup or honey.
• If they are too stiff, add up to 1/4 cup of chicken stock.
• Spice it up with some cinnamon, nutmeg or cloves.

Note: Do not add anything in the dairy family: milk, cream, cream cheese, sour cream, cheese, etc. Trust me, not a good compliment. 

As for nutrition, sweet potatoes can't be beat. Lot's of beta-carotene, which is better absorbed with a little fat. BONUS! Check this out.