Tuesday, April 26, 2011

Croque Monsieur


Ohh la la, Croque Monsieur. What the heck is it? Well first, it's delicious. Second, it's a gourmet French version of a grilled ham and cheese sandwich, 
but, well. . .hmmm. . .
it's not grilled and, well. . . 
there's more to it than just ham and cheese, but. . .
it is delicious, believe me!

I've only been to France once, way back in 1984, way back! And well, I was only in Paris, and only there for three days. Although I was there, I can't say I spent enough time to absorb much culture. Going back is on the "bucket list", along with about a million other things, I'm only in my 40's, I've got time, right? RIGHT? So although I'm no expert on French culture I do love to eat French food. So how did I discover this gem? In the same odd, round-a-bout way that I seem to stumble on a lot of stuff.

Last year when my husband went away on a business trip, per usual, I went and rented a bunch of "chick flick" DVDs, movies I knew he didn't want to see but I did. Among the pile of rentals was "It's Complicated". Now oddly enough, I didn't really care for the movie although it had a lot of actors that I like in it. I didn't hate it, I just don't think it was meant for me, I'm not "that" age, I'm not divorced, etc. What I did like (or should I say envy) was that the main character owned a bakery, and in many scenes she was cooking or baking. At one point the ex-husband character mentions how much he misses her "Croque Monsieur". Now why I keyed in on that one thing from the movie, who knows? I'm weird, I just do things like that. But I was intrigued. What was it? I had to know. So off to the internet I went and here is what I discovered. Enjoy!

Oh and by the way, there are about a million different versions of this sandwich and much debate on what makes it an authentic Croque Monsieur. Pretty much every café and every chef has a different take on it. The common thread is that it has ham, cheese and is cooked. This is my version, authentic or not.


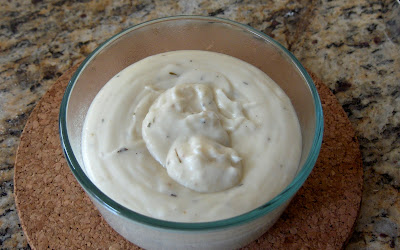
First you need to make a Bechamel Sauce (it just a fancy term for a basic white sauce) and it needs to be cheesy. You'll need: butter, flour, whole milk, nutmeg, Thyme (or your favorite dried herb), and shredded Swiss cheese.

Start by melting the butter in a small saucepan.

Then add the flour and whisk it around. 
Cook it for 1-2 minutes but DON'T let it get brown.

Whisk in the whole milk and then add the nutmeg and thyme.

Continue whisking until the sauce comes to a boil and thickens.

Remove from heat, add the shredded cheese and whisk until smooth.

Let it cool and then refrigerate until you're ready to use it.
You can make this a day or two in advance.

To make the sandwich you'll need: a loaf of rustic French Bread, olive oil, your cheesy Bechamel Sauce, ham, salt, pepper, shredded Swiss Cheese, parmesan cheese, spinach (optional) and tomato (optional).

Drizzle a rimmed baking sheet with 2-3 tablespoons of olive oil. Cut 4 (or more) 3/4-inch slices of French Bread. Lay them on the baking sheet and slide them around to make sure the bottom side is evenly coated with olive oil.

Spread 2-3 tablespoons of the Bechamel Sauce on each slice of bread making an even layer all the way to the edges of the bread.

Top each slice of bread with 2 slices of ham. 

If you like you can add tomato slices, spinach, or any kind of thin-sliced vegetable.
Red pepper and zucchini are good but should be pre-cooked.
Salt and pepper to taste.

Next add 4 tablespoons of grated Swiss cheese to each slice, in an even layer, and grate approximately 1 tablespoon of parmesan on top of that.

Bake in a HOT 400°F oven for 15-20 minutes until the cheese is brown and toasted and the bottom of the bread is toasted and crunchy. You don't want to just melt the cheese but really bake the whole sandwich.

And there you have it. A delicious, customizable, French delight. You can eat it with a knife and fork if your so inclined but I usually just grab it with my mitts and dive in. 
Bon Appetite!

Croque Monsieur
Preheat oven to 400°F
Serves 4

4 3/4-inch slices of rustic French Bread
2-3 T. olive oil
Cheesy Bechamel Sauce (recipe below)
8 slices Black Forest Ham
Salt & Pepper to taste
1 C. grated Swiss Cheese
4 T. grated Parmesan Cheese
8 thin slices of tomato (optional)
10-12 spinach leaves (optional)

Drizzle a rimmed baking sheet with 2-3 tablespoons olive oil. Place the slices of bread on the baking sheet and slide them around a bit so that the bottom side of the bread is evenly coated with olive oil. Spread 2-3 tablespoons Cheesy Bechamel Sauce on the top side of the bread slices, spreading it out evenly to the edges. Top each piece of bread with 2 slices of Black Forest Ham. Add a few tomato slices and spinach leaves, if desired. Salt and Pepper to taste. Next, add approximately 4 tablespoons of grated Swiss Cheese and 1 tablespoon grated parmesan cheese to each bread slice. Bake in a 400°F oven for 15-20 minutes until cheese starts to brown and bread is crispy and toasted on the bottom.

Cheesy Bechamel Sauce
(can be made a day or two in advance)
2 T. butter
2 T. flour
1 C. whole milk
Pinch nutmeg
1/4 t. dried Thyme (or your favorite dried herb)
1/2 C. shredded Swiss Cheese

Melt butter in a small saucepan. Add flour, whisk and cook for 1-2 minutes (do not let get brown) Whisk in milk. Add nutmeg and Thyme. Continue to stir until sauce comes to a boil and thickens. Turn off heat. Add shredded Swiss Cheese  and whisk until smooth. Let cool and then refrigerate.

Thursday, April 21, 2011

Mandelhoernchen Melancholy


If you read my post earlier this week then you know last weekend I had a disaster in the kitchen. I was pretty bummed. Mandelhoernchen was a recipe that I had been searching for for over 10 years and I was so excited to finally find it and be able to make it. You can imaging my disappointment when it didn't turn out as expected. But, alas, if you are going to try new things, you just have to accept that they won't always turn out right. The point is, keep trying. 

Through my years of cooking, or learning to cook, there has been lots of trial and error. In the early days, mostly lots of error. But a mistake is only a mistake if you don't learn from it. Believe me, I've learned A LOT. With each recipe, regardless of outcome, you learn about the ingredients, the technique, the flavors. You learn about what works and what doesn't, that's really how you get good any anything. Whenever my children get disappointed that they aren't "good" at something, sports, a musical instrument, cooking, I tell them "You have to be willing to be bad if you want to be good." No one starts out an expert at anything, the trick is to keep trying, keep learning. And even, like me, the veterans make mistakes from time to time. 

So what did I learn last weekend? Hmmmm, let's start by examining the mistakes, they are so obvious now, in hind sight.

First Mistake: I made my own almond paste. Now this isn't really a mistake as I think it turned out pretty good. It was easy to make and if you've seen the price of almond paste you'll know why I tried it this way. Much, much less expensive. But almond paste isn't an ingredient that I'm very familiar with. I have used it just once or twice before so I wasn't super confident about how mine turned out. The smart thing would have been to purchase some and compare it to what I had made, just to be sure. But I didn't.

Second Mistake: Because I was uncertain about the consistency of my almond paste, I added some additional liquid (in this instance, Amaretto) just to loosen it up. Shouldn't have!

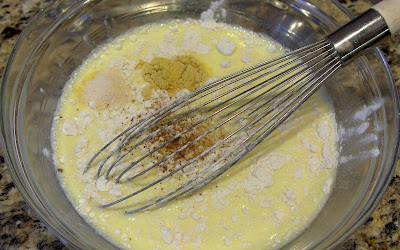
Third Mistake: Per the recipe, I went the "short cut route" and used my food processor instead of my mixer. Should have used the mixer so that it would mix rather than cut up the ingredients.

Fourth Mistake: I added all the egg whites at once and the whole thing turned into a big gluey mess. Should have added them one at a time, checking the consistency along the way.

Fifth Mistake: I tried to "fix" it. I just started to add more and more almond paste and some sugar into the processor thinking it would get thicker. Instead it just got lumpy and then my processor started sounding and smelling funny. I'm praying that I didn't burn out the motor. I haven't turned it on since, I'll keep you posted on it's fate. Have you seen the movie "Tin Cup"? You know the scene where he just keeps whacking at ball after ball, trying to make the shot. Doesn't know when to give up and ends up losing the tournament? Seen that? Well, that was me in the kitchen. Just didn't know when to call it quits.

At the end of it all I was out, 2 pounds of home made almond paste, sugar, eggs, possibly my food processor, and my ego. I don't even want to think about all the time I spent, blanching, peeling and grinding the almonds for the almond paste. All that work and it ended up in the trash. (Except my food processor, I hope!)
So what did I learn? Lots! First of all, make sure your are familiar with the nature of an ingredient before attempting to make it on your own. Second, don't take shortcuts, even if the recipe says it will work. Third, know when to recognize that things have gone wrong and know when to throw in the towel and start over. And lastly, try again.

Almond Paste Comparisson
Left: "Odense" Pure Almond Paste, the smoothest. Middle: My home made, definitely the best almond flavor!
Right: "Solo", kind of bitter, kind of oily, smoother then mine.


I'm happy to report that my second attempt at Mandelhoernchen was a success. I used store bought almond paste, purchasing two different brands just to compare. I added the egg whites one at a time until the consistency was right. I followed the recipe exactly as written, no short cuts. And they turned out just as I had remembered. Delicious, chewy, crispy and almondy. Wonderful, wonderful, wonderful. I will most surely be making these again. I need to play around a bit with the recipe before I'm ready to post it for you but I promise I will. 

So please, go forth, try new things and don't be afraid to make mistakes. Learn from them, you'll be happy you did.
Becky

Monday, April 18, 2011

KAF Donut Muffins (a rescue story)

Life is funny. I was all set to post a recipe today for Mandelhoernchen, the most delicious almond cookie on the planet, but thats just not going to happen and here is why:


A long time ago, when I worked near Downtown Sacramento, I would sneak over to Freeport Bakery and treat myself to one of these life changing delights. For over 10 years, I have been searching, off and on, for a recipe but never knew what they were called. Almond Horns? Almond Crescents? I found a lot of recipes but they were usually flour and butter based and the pictures did not look at all like what I had remembered. Hmmmmm? Then EUREKA! Just two weeks ago I was poking around on Gesine's blog, Confections of a (Closet) Master Baker, and I found it. The name of these treats, the recipe, the picture of exactly what had eluded me oh these many years. What joy! What bliss! Finally the reward for my long and steady search; I couldn't wait to make then. I carefully gathered all the ingredients, even when so far as to make my own almond paste, and got to cooking. It was a DISASTER! I'm really too raw and emotional to go into detail about it now. I'll post about it later, when I've perfected the recipe, when my confidence has recovered. Please, stay tuned.


Now, I was always taught "When a horse throws you, get back on and ride it." So, in spite of my earlier disaster I headed back to the kitchen to bake. This time, just to get my confidence back up, I'm sharing one of my tried and true recipes. One that is in pretty heavy rotation around our house. One that never fails to please and always, always turns out good. Really good! Donut Muffins. You can find the recipe here on the King Arthur Flour web site. (oh and BTW, great web site, go poke around and check it out.) These muffins have the same taste and texture of a plain cake donut. They are delicious and easy to make. Enjoy!


Here is what you need: butter, vegetable oil, sugar, brown sugar, eggs, baking powder, baking soda, nutmeg, salt, vanilla, flour and milk (I'm showing buttermilk, which works fine but I actually prefer whole milk, use what you have.)


Start by generously spraying your standard 12 cup muffin tin with non-stick cooking spray. NOTE: This recipe does not work well with muffin papers, I don't recommend using them.

Cream together the butter, vegetable oil and sugars until light and fluffy. (See this post on cookies for an example of "light and fluffy".) Add the eggs and mix to combine.

Stir in the baking powder, baking soda, nutmeg, salt and vanilla.

Stir in the flour and milk alternately beginning and ending with the flour, mixing WELL with each addition. As opposed to most muffin recipes which require gentle mixing, you want to make sure these are well mixed!

Use this mixing sequence for best results: 1 cup flour, 1/2 cup milk, 1 cup flour, 1/2 cup milk, 2/3 cup flour. 

Scoop the batter evenly into the prepared pan. They will be pretty full so don't be worried.  (I use a #20 disher/ice cream scoop.)

Give the pan a gentle rap on the counter to settle the batter into the bottom.

Then into a 425°F oven for 13 to 15 minutes just until the tops are a light golden brown. A toothpick inserted in the center of a muffin should come out clean. Resist the urge to get them any darker than in the picture.

Let them cool just a few minutes in the pan, then remove to a cooling rack to continue cooling. The bottoms of my muffins here are a bit darker than I'd like because I have dark, coated pans which, by the way, I don't like. If you're buying new pans in the near future, keep this in mind!

You'll have to forgive me, I forgot to take any pictures of the next few steps. I'm a little off my game since the Mandelhoernchen disaster. Recovery is in the works!

To finish the muffins: In a small cup melt 4 tablespoons of butter. In a separate small bowl mix together 3 tablespoons sugar and 3 teaspoons cinnamon. Dip the tops of the muffins into the melted butter and then into the cinnamon/sugar. Serve warm or let cool completely and store in a airtight container.

Enjoy!
Becky

Tuesday, April 12, 2011

Ham, Egg & Cheese Pie


One thing you learn pretty quickly when you have kids, particularly during the toddler years, is that marketing is everything. In order to maintain your sanity you have to be an expert on spin, diplomacy and the art of letting them have your way. You become deft at packaging new ideas, foods, activities and chores, so not only will they do as you ask, but do it with vigor. Now I'm certainly not advocating that you lie or trick your children, just carefully choose your words so that they WANT to do the thing that you want them to do. As in "Wouldn't it be fun to see who can pick up the most toys in 10 minutes, now ready. . .set. . .go!" Before they have the chance to realize that they are doing "work" they've cleaned the room. Victory for everyone!


So that's how our family came to enjoy Ham, Egg and Cheese Pie. You and I both know it's quiche, but what 4 or 6 year old in their right mind would eat quiche. Sounds weird. Sounds foreign. Sounds down right YUCKY! But what they'll gladly eat is Ham, Egg and Cheese Pie. They like ham, it makes a delicious sandwich. They like eggs, boiled, scrambled, fried. They could survive on cheese alone if just given the chance. Top it all off with the word "Pie", a word that says "Yummy" all by itself, and you've got a winner for dinner. (Wow, pardon that cheesy rhyme.)


Now that my kids are older they eat quiche and they love it. But do what you need to do to get your family to at least try it. The bottom line is that quiche is an easy to make family dinner. Once you get the basic recipe the possibilities for variation are endless. Again, I invite you to tweak, fiddle and modify to your hearts content. . .


Here's what you need for the basic recipe: eggs, milk - skim, 2%, whatever you have on hand, sour cream, flour, onion powder, salt, nutmeg, shredded cheese (I prefer a combination of Swiss cheeses, something with a little tang.), powdered mustard, ham (I just used sliced lunchmeat.) and a 9-inch deep dish pie crust.

You can make your own favorite pie crust or just use a store bought one like I've done here. If you make your own, eliminate any sugar if called for in the recipe. If you're using store bought, check to make sure there isn't any sugar in the ingredients. The sweetness will be weird for this savory dish.

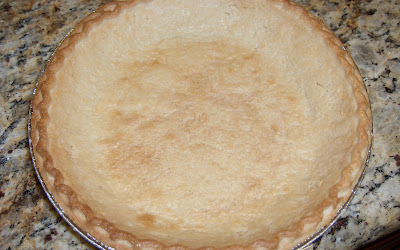
Start by pre-baking your crust. Line the crust with a layer of foil smoothing it down so it is snug against the crust. Pop it into a 450°F oven for 5 minutes. 

Remove the foil and bake for an additional 5-7 minutes or until it's nearly done. Reduce the heat on your oven to 325°F.

Dice the ham slices into approximately 1/2 inch pieces.
(1/4-inch cubes if you're using a ham steak)

Layer half the ham into the bottom of the pie crust.

Add the shredded cheese on top of that and finish with the remaining ham.

Mix the eggs, milk, sour cream, flour, onion powder, salt, nutmeg and mustard.
Blend with a whisk until well combined.

Set the crust on a sheet pan and gently ladle the "custard" mixture on top. Fill it about two thirds of the way then set the sheet pan on the middle rack in the oven and finish filling to almost the top of the crust. You may have a bit of extra custard mix leftover. The sheet pan will keep your oven clean if you happen to have an overflow. Now into the oven, 325°F, for 45-55 minutes.

The quiche is done when the center is no longer jiggly and knife inserted in the middle comes out clean. If the edges of the crust start to get too brown just cover them with foil. Let it rest for a good 30 minutes or more before cutting. Serve with green salad for an easy weeknight dinner. This also makes great leftovers. Just refrigerate and microwave slices as needed.

Here are some ideas for variations, get creative and use whatever leftovers you have available:
- Replace the onion powder with 1/2 an onion, diced and sauteed until tender, 
  layer with the cheese.
- Replace some or all of the ham with diced, cooked veggies (broccoli, asparagus,
  spinach, red bell pepper, etc.)
- Replace the ham with cooked crumbled bacon, cooked crumbled sausage,
  crab meat, or chopped cooked shrimp. (For seafood, adjust the spices, use dill 
  and/or lemon juice)

Enjoy!
Becky


Easy Basic Quiche
1 unbaked, 9-inch, deep dish pie crust
3 eggs
1-1/2 C. milk
1/2 C. sour cream
1T. flour
1t. onion powder
Dash nutmeg
1t. dry mustard powder
1/2 t. salt
4 oz. ham, diced
1-1/2 C. shredded cheese

Preheat oven to 450°F. Line the pie crust with a layer of foil and bake for 5 minutes. Remove the foil and bake for 5-7 minutes more until browned and nearly done. Turn the oven down to  325°F.
Layer half the ham on the bottom of the partially cooled pie crust. Layer all of the shredded cheese on top and finish with remaining ham.
Combine the eggs, milk, sour cream, flour, onion powder, nutmeg, mustard and salt. Whisk until well combined.
Set the pie crust on a sheet pan and gently ladle egg/milk mixture on top until crust is full. You may have some egg/milk mixture left over.
Bake on the center rack of a 325°F oven for 45-55 minutes until center is firm and a knife inserted near center comes out clean.
Let cool 15-30 minutes before slicing. Refrigerate any leftovers.
Serves 6

Tuesday, April 5, 2011

King Cake


Yes, yes, I know, Mardi Gras is over. Long over. I however have always wanted to try my hand at "King Cake", a Mardi Gras tradition. So, what the heck, I'm going to make it anyway. My kitchen, my rules! Right? So in the past I have "googled" King Cake and have found a million recipes and a million versions; from the very easy to the extremely step intensive; all claiming to be authentic. So how do I dig through all the recipes and find a good one? Funny you should ask. And funnier still, is how I did find a good one. And boy, is it good!

You know, the internet is a funny thing. Kind of like those "choose your adventure" books. What you discover can be in the strangest of places, arrived at by a totally random series of links and mouse clicks. All you need is a little curiosity and some time. Here is how I found this recipe and one of my new favorite blogs.

About a year ago, I was searching the internet for cake design ideas which eventually lead me to the blog  "Cake Journal". Louise had a list of her favorite blogs, so I checked them out. One I really liked was "Bakerella". (Seriously check her out. Her blog is great. She has been ill lately so hasn't been blogging much but look around her blog. Lots of great stuff there!) Bakerella quickly became one of my favorite blogs so I decided to follow her on Twitter. Then about a month ago, Bakerella "retweeted" a comment by "@closetmastrbakr". So, I went and checked out her blog "Confections of a (Closet) Master Bakerand was hooked. Then low and behold, Gesine* posted a recipe for King Cake. I took it as a sign, that I must finally make King Cake and thus I did.

Here is how it all turned out:

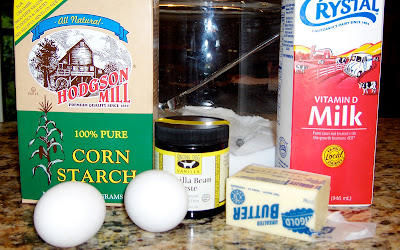
First start out by making some pastry cream. The recipe is here. You need whole milk, vanilla bean paste (I used it - 2 teaspoons - instead of the vanilla bean and extract called for in the original recipe.), cornstarch, sugar, eggs and butter.


Put the eggs, cornstarch, vanilla and sugar in your mixer and whip on high until light and fluffy.


While that's whipping, getting light and fluffy, bring the milk to a boil in a heavy saucepan.


See, nice and light and fluffy.


With the mixer on low, slowly add the boiling milk. Not too fast, you don't want to scramble your eggs. When the milk is all in there, turn the speed up and whisk until it's all incorporated.


Put the mixture back into the saucepan and whisk constantly over medium heat until it boils and thickens.


Remove from the heat, add the butter and whisk until it's completely incorporated.


Pour immediately into a bowl and put a piece of plastic wrap right on top of the cream. This will keep a skin from forming. Allow it too cool completely. You can make this a day or two ahead, I did. Just store it in the refrigerator until your ready to finish making the King Cake.


So, now, on to the cake (full recipe is here). Ingredients: bread flour, instant yeast, salt, maple syrup, eggs, whole milk, lemon (for zest), vanilla bean paste and unsalted butter.


Put the flour, yeast and salt into the bowl of your mixer fitted with a dough hook. Stir them together with the mixer set on low.


The best way to get good lemon zest is with a microplane grater. I was feeling kind of lazy and didn't have a lemon, so I almost skipped this step. Then recovered from my weakness and drove to the store for a lemon. Boy was I glad I did. Then minute I started zesting, the smell was divine and I know it needed to be in there!


In a separate bowl, mix together the maple syrup, 2 whole eggs, milk, lemon zest and vanilla.


With the mixer on low, slowly add the wet ingredients to the dry. When they are just combined, add the softened butter a bit at a time.


Mix on medium until the dough pulls away from the side of the bowl, is no longer sticky and is kind of shiny. You may need to add addition flour, up to a cup, if your dough is really sticky. (I did in fact use the full cup of extra flour). This process can take up to 15 minutes.


Almost done.


Proof the dough until doubled in size. The best way to do this is in a container with high, mostly straight sides. Spray with non-stick spray and plop the dough in. Make a mark (the best way would be to use a small piece of tape, but I didn't think of that until I had used a Sharpie marker.) where the top of the dough is. Loosely cover the top, plastic wrap, paper towel, whatever you have handy.


Here it is after almost an hour, not quite there.


A little longer and it's done. Twice as high as it was, so doubled in size.


Punch the dough down and roll out, on a well floured surface, into a 24-inch by 12-inch rectangle.


Flavor the pastry cream with bourbon and cinnamon.


And spread it out evenly over the dough.


Roll the dough up, starting with the long edge, into a tight roll. From the roll into a circle and pinch the ends together securely.


Every few inches make a slash into the roll exposing some of the filling. Allow it to rise until doubled in size again.

Brush the whole thing with 2 beaten egg whites and sprinkle with sugar. The recipe calls for granulated sugar but I had some in the traditional Mardi Gras colors (gold, green & purple) so I used that. Bake in a preheated 350°F oven for 30-40 minutes until golden brown.

When completely cooled, drizzle with glaze. The original recipe calls for colored glaze but since I used the colored sugar I left the glaze uncolored.

This is what a slice looks like. I didn't use enough flour on my surface so the dough stuck a bit and I had a hard time getting a tight roll. But, it tasted great. I will definitely make this again. I'm thinking of flavoring the pastry cream with almond and sprinkling the top with sliced almonds. I'll keep you posted on that.

Here are the links again:


* Gesine has two great books: My Life From Scratch and Sugar Baby. I own them both! They are great. Check them out.