

Royal Icing can be tricky. Mostly because you have to be very careful with the equipment you are using. The ingredients are pretty simple, it's the procedure and equipment that are the keys to success. Royal Icing is great for make ahead decorations or "run-in" designs. Once dried, it is hard and crunchy and will keep for a very long time. (Although I wouldn't recommend it.) It isn't creamy or flavorful so I only recommend it for decorations, flowers, and cookie decorating. The only flavor it has is "sweet", unless you add some extract to it (but NOT oil based flavors, I'll go more into that later.) It works really well on rolled-out sugar cookies because it dries hard and you can stack the cookies together without messing up the decoration. Lastly, once dried it doesn't need refrigeration.
About the equipment. Royal Icing owes it structure and texture to the egg whites, which are protein. One tiny bit of fat (yoke), grease, oil, butter etc. will cause the structure of the protein to break down and you'll just get a soupy mess of egg and sugar. Plastics are a by product of petroleum distillation, which means they are polymers derived from oil. Whenever you use a plastic utensil or vessel for anything that contains fats or oil a small bit of that fat/oil will bond (on the molecular level) with the container or utensil. That's why you can't get those spaghetti sauces stains off your plastic. Make sense? So what does that mean when making Royal Icing. It means that you need to be certain that nothing you use (bowl, spatula, whip, icing bag, icing tip, etc.) has any traces of fat on it. For glass and metal equipment, just simply wash in very hot soapy water, rinse in a vinegar-hot water solution and then rinse again in just hot water and let dry completely. For plastic equipment you have to be certain it's never ever been used with anything that contains fat or oil. If you don't make Royal Icing often, just stick to metal and glass equipment. I make Royal Icing quite a bit, so I have bought a set of spatulas and serving savers and marked them "ROYAL ONLY" with a sharpie marker. OK, enough with the science lesson, I think you get it, so let's get started.

Here is all you need: Powdered Sugar and egg whites. I like the powdered ones because there isn't any chance of contamination by bacteria or egg yoke (fat). One itty bitty bit of egg yoke and your icing will not work. Wilton  and Ateco
 make "Meringue Powder" which a lot of people like to use. Wilton also has a product called "Color Flow
 " which leaves a shiny finish when dry. They will all work with the procedure below but they have other ingredients/additives in them that aren't really necessary and that I'm not interested in having in my icing.

Start by putting your egg whites and powdered sugar in a mixing bowl with the whip attachment.

Add water and whip until thick and creamy. This can take 7-10 minutes. This is where you'd add flavor if you are using it. Make sure the extract isn't oil based. Lemon extract or lemon juice work well. Vanilla works but will give your icing an off-white color.

It's done when it holds a peak or the marks left by the beater for at least a count of ten. OK, that's it, you are done making the icing. Super easy! Now here's how to use it.

I was making a bunch of small drop flowers to decorate the tops of mini cupcakes and I needed 4 different colors. Divide the icing into 4 grease free, containers.

Royal Icing tends to form a crust pretty quickly so I lay a bit of damp paper towel right on top of the icing.

Cover with a tight fitting lid. Keep them covered at all times. Use gel (NOT OIL BASED) colors starting with just a small bit of color and adding more as needed until you get the color you want. NOTE: Icing will darken a bit as it dries so mix it just a shade lighter that you'd like.

To pipe, I like to use these disposable bags . And here I'm using a Wilton #2 tip.

Snip off the end of the bag and insert the tip, stretching the bag a bit at the end to make sure you have a snug fit.

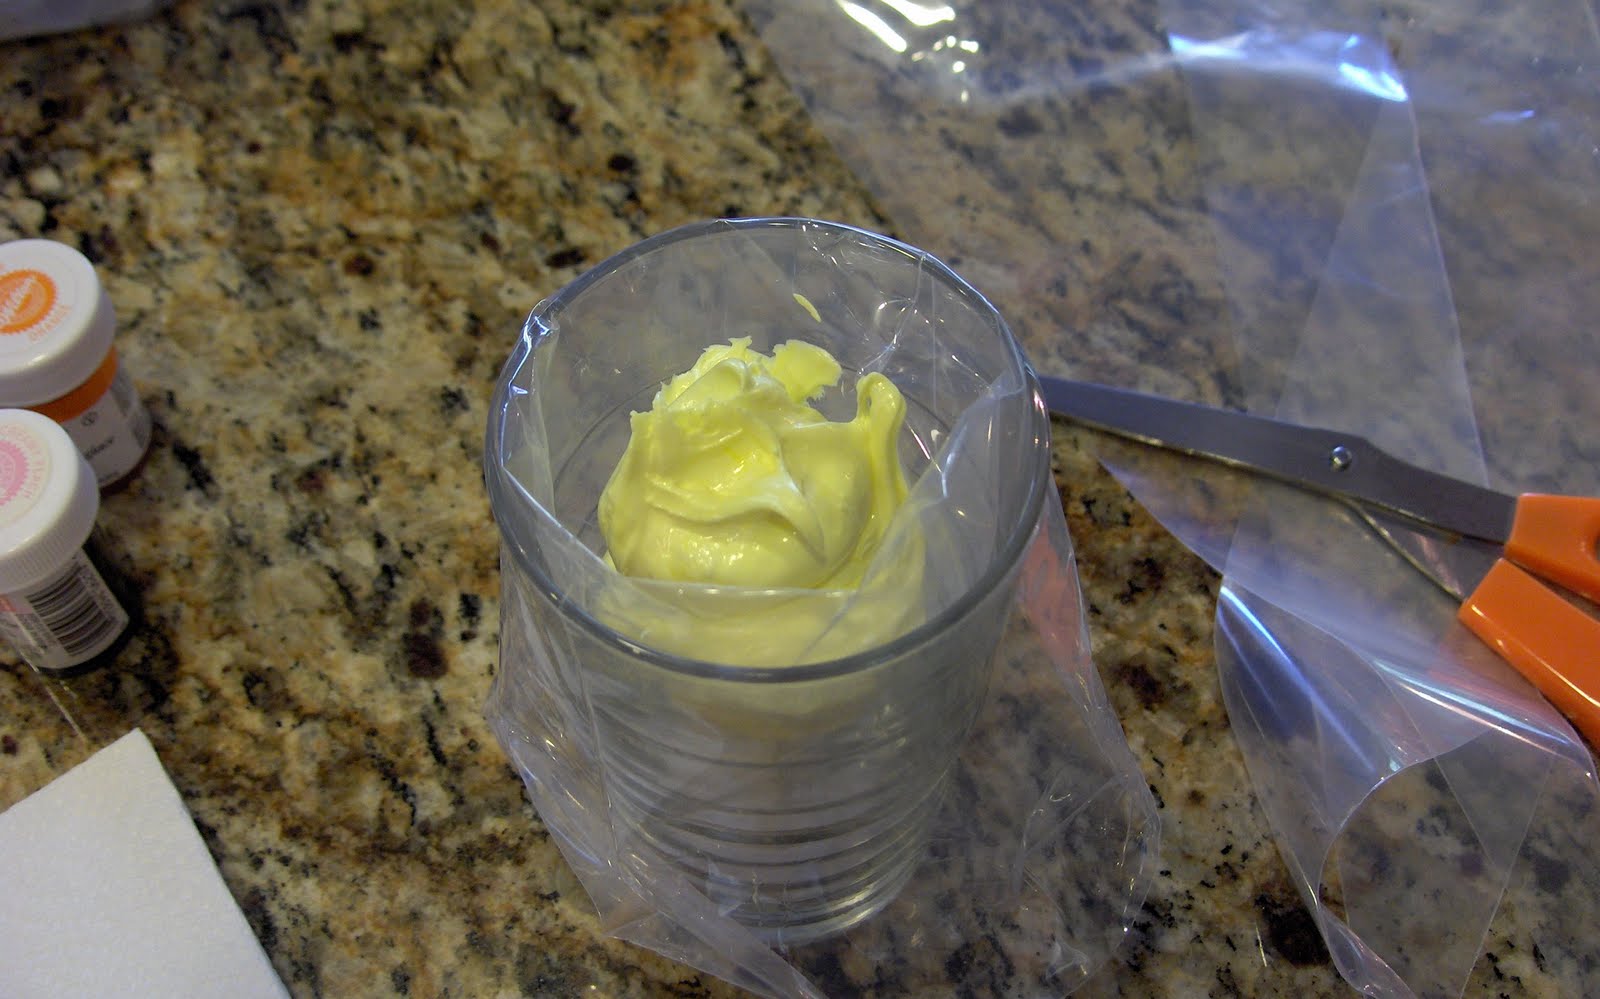
To fill the bag, set it, tip down, in a glass and fold the top of the bag back over the glass. Makes for easy filling.
Scoop in the desired amount of icing. Then fold the top of the bag back.

Give the end of the bag a twist and wrap the tip with a damp piece of paper towel while you set up the rest of your colors and bags.

I needed to make uniform sized drop flowers so I printed out a bunch of circles (1/4, 3/8 and 1/2 inch) on an 8.5x11 piece of paper. Lay your template down on a flat surface. I'm using a particle board cake board that I got at the cake supply store but you can use the back of a cookie sheet. Securely tape a piece of parchment paper over the template.

When piping your flowers pinch the twisted end of the bag in the crook of your thumb to keep the icing from coming out of the top end. Squeeze with a downward motion (index finger, middle finger, ring finger) to send the icing out in the direction of the tip. Kind of like milking a cow. Like I've ever milked a cow, ha ha. You get the idea.

Start piping your flowers using the circles as a guide. I choose to use the 3/8 inch circles and pipe a 5 petaled flower with a white center.

Now just start piping away until you have as many flowers as you need. Probably a good idea to pipe some extras just incase some break, which a few always do. Set aside to dry completely. This takes about 24 hours and they should no longer look shiny. If you've made something a bit thicker let it dry longer. Once completely dry they can be stored in a zipper bag (a couple of weeks or more) until you are ready to use them. Careful, they are delicate and can break so store them someplace safe.
Royal Icing
3 T. dried powdered egg whites
1 lb. powdered sugar
6 T. water
Beat all ingredients on medium speed until icing forms peaks. (7-10 minutes)
Cover tightly until ready to use. If icing separates re-beat before using.
No comments:
Post a Comment