Is it really October already? Really? Gee whiz, where did this year go? October is one of my favorite months. I got married in October. My parents got married in October. My Mom and Dad were both born in October. And of course, Halloween is in October. I wanted to put a Halloween treat on the blog and cookies immediately came to mind. What I really wanted to do was some super creative sugar cookie with perfect icing, and really tight detail. But, honestly, I just didn't have the time to pull it together. The rolling, the cutting, the icing, bla bla bla. Heck, I was feeling lazy.
I had seen, at the supermarket, a "Candy Corn" cookie. Basically a yellow colored triangle-shaped cookie with one end dipped in white chocolate and the other in orange. Super cute. I figured there had to be a simple way to get the same effect so once again, I headed to Google. These cookies came up on a bunch of different blogs. They are pretty simple so I though I'd give 'em a try. I found a video tutorial by Land O'Lakes on YouTube. But when you make them like the video, half the cookies have the colors "backwards". True candy corn has a white tip, an orange middle and a yellow end. With the technique on the video only half turn out that way. The other half have a yellow tip and a white end. Hmmmmm, there must be a solution for my OCD brain. With a little more internet sleuthing I discovered Sweet Sugar Belle was having the same dilemma. Here is how she solved it. Not bad, but I wanted to avoid the whole dipping in chocolate thing. There must be a way? And then it came to me. Eureka! I figured it out. Now let's see if it will work. . .

Here's what you need: butter, powdered sugar (odd for a cookie recipe, but I went with it.), eggs, vanilla, almond extract, an orange (the recipe calls for orange juice), salt, flour and baking soda.
Start by creaming the butter and sugar. Get it good and creamy and very light colored.
Taking a small departure from the recipe, I not only juiced but also zested the orange. (I love my microplane grater!)
Add the egg, vanilla, almond extract, orange juice and orange zest. Beat until very creamy, light and fluffy. This may take a while as there is a lot of liquid for the amount of butter. Just keep going until it is a cohesive mass. (Oh, like that vocab? Kind of makes me sound smart. Ha!)
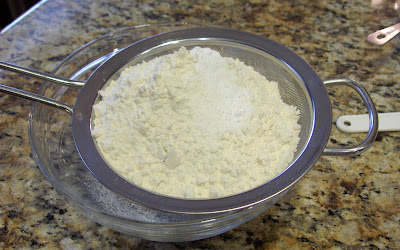
Next, sift together the flour, salt and baking soda. Add it to the mixer and mix just until incorporated.
Mmmm, this is pretty yummy cookie dough!
OK, here is where I take a big departure from the recipe and video. Divide the dough so that you can color it. The most accurate way to do this is with a kitchen scale. First divide the dough into equal thirds. Then divide one of the thirds in half. You then have two dough portions that are 1/3 of the recipe and 2 that are 1/6 of the recipe. Add one of the 1/6 portions to one of the 1/3 portions.
If your math was right you'll end up with 3 portions of dough. The smallest is 1/6 of the recipe, the middle is 1/3 (2/6) of the recipe and the largest is 1/2 (3/6) of the recipe. Whew, kinda complicated. Seriously, I'm a baker, not a mathematician.
Leave the smallest portion as is. Color the middle portion yellow and the largest portion orange.
Here is the yellow and orange. Wrap each color separately and chill for a couple of hours.
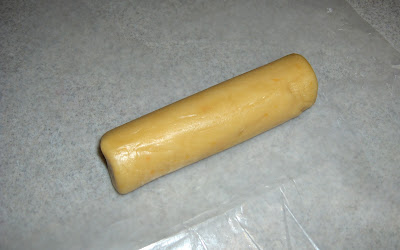
Working with one color at a time, keeping the others chilled, form your "log". Take the smallest (white) portion and form it into a cylinder about 1 inch in diameter and 5 inches long. Wrap tightly and return to the refrigerator.
Take the middle-sized (yellow) portion and roll it into a rectangle approximately 5 inches by 6 inches. I didn't want to add any extra flour to the cookies so I rolled it out between two sheets of waxed paper.
Lay the white dough onto the yellow dough and wrap the yellow around the white completely. Press firmly so that there are no gaps between the layers.
Here's what it will look like. Wrap tightly and return it to the refrigerator.
Repeat the same process with the largest (orange) portion. Rolling it out to a 5 inch by 10 inch-ish rectangle.
Wrap it around the yellow, pressing tightly so again, no gaps.
Wrap tightly and chill for a couple of hours. Overnight would be great.
To form the cookies, first slice off the very end of the log to make a clean even end. Then slice off 1/4-inch thick slices.
You'll have several of these "bullseye" slices.
Next, divide each "bullseye" into 6 wedges.
Lay them out on your cookie sheet and chill for 10-15 minutes.
Just before baking. Press each wedge into clear sanding sugar. This gives them a nice sparkle. You can skip it, but I like sparkle.
Pop 'em into a 375°F oven for 7-10 minutes.
Wahoo, it worked, Candy Corn Cookies. First of all I LOVED the taste (vanilla, almond, orange combo) and texture (very soft and tender) and will definitely experiment more with this recipe. For some reason they didn't hold their shape really well. I may have overworked the dough and then not let it rest long enough. And well, although I like that the colors are all in the right order (not really, see my note below)*, it was A LOT of work to get them that way. Next time I'll probably just layer the dough in a pan like the Land O'Lakes video and just live with the fact that half the cookies will be "backwards". I mean, seriously, who cares because they are delicious.
*Oh. . . and. . . well. . . um. . . I figured out after my cookies were baked that I mixed up the yellow and orange. So much for being OCD. To really look like candy corn you would color the middle-sized portion ORANGE and the largest portion YELLOW. Then start with a white core, then wrap with orange, then wrap with yellow. Have I really confused you now?
Here is the recipe I used from Sweet Sugar Belle:
And Here is the Land O'Lakes video tutorial:


