Showing posts with label Pie. Show all posts

Thursday, November 13, 2014

Pie Crust


Hey there, miss me? No worries, I'm back. If you read my last post from a couple of weeks ago you already know that I needed a break. Just a couple of weeks to catch my breath. And whew, I did. It was nice. Sorry, I didn't post any "best of" collections, forgot to roll over my 401K and only partially got my house cleaned. Whateves. I did have a yard sale, feels sooooo good to purge and went on a date with the hubs, love that man. So. . .mission partially accomplished and that's good enough for me. I also had some time to cook without the added pressure of uploading to the blog. But I did take pictures so I've got some stuff to share. Here goes. . .

Since the holidays are just around the corner why not get ahead of the whole baking thing. Get some "stuff" in the freezer to streamline the process down the road. You can't quite get started on your finished desserts but you can get a couple of pie shells in the freezer ready to go. So get too it.

I tried a new pie dough recipe that I found on the Woodland Bakery Blog. I've searched a long time for a good "go to" pie shell. I really like Gesine's "Quick Puff" and will use that one again. But there's a lot of folding and rolling (I posted about it here.). It's good, and very flakey and I like the idea of using it for a lattice topped fruit pie. But, I wouldn't call it all purpose. However, this recipe came together quickly, used pantry ingredients and most of all, was buttery and flakey. All purpose. This is the perfect recipe to make, a couple of times over, form into shells and freeze for later. Check it out. . .

Monday, February 27, 2012

Double Chocolate Chess Tart


I didn't read the book "The Help" so when the movie came out I didn't rush to see it. I don't know? For some reason it just didn't appeal to me. A lot of "chick flicks" don't and I'd somehow got the impression that "The Help" was one. But, it got really good reviews and even some of my more manly men friends liked it. Hmmmm, maybe it wasn't your typical "chick flick". I was curious. So, one afternoon, while folding laundry, I queued it up on the ole DVD player. WOW, I loved it, what a great movie. I even paid for an extra rental day so my daughter could see it. (BTW, she loved it.) Of coarse I was immediately drawn to the character of Minny. Sassy, opinionated, strong and the best cook around. We were instant imaginary BFFs. (Does anyone else have imaginary fictional character BFFs? Or, am I just crazy? Wait, don't answer that!)

Seeing the movie inspired me to get back to my southern roots and rediscover chocolate pie. Not just any chocolate pie. Not fluffy, crumb crusted, chocolate cream pie. No, I wanted that most southern of chocolate pies, Chocolate Chess Pie. I fumbled around on the web and found a few recipes settling on one from In Jennie's Kitchen. But, I wanted to put my own spin on it, you know, up the wow factor. What's more "wow" than more chocolate so I decided to use a chocolate crust. My next concern was sweetness. Chess pies are super sweet, I mean really sugary. So I went the same route as I did with my Pecan Tart and adjusted the filling for a tart rather than a pie, yielding a more even ratio of crust to filling. I'm happy to report that the resulting Double Chocolate Chess Tart was a huge hit with everyone in my family and the two good friends who were kind enough to taste it for me. A buttery tender chocolate crust and filling that's light and crispy on top and fudgy in the middle. I hope you'll agree. . .

For the chocolate pastry crust here's what you need: AP flour, Dutch process cocoa, sugar, salt, butter, shortening and some ice water. You could probably use all butter, eliminate the shortening, but your crust may be a bit more crumbly and harder to work with. I've found the combination of butter and shortening works best.


Sift together the flour, cocoa, sugar and salt.


You may need to sift it a couple of times, you want a nice uniform mixture. Use a whisk to get the last bits of cocoa and flour mixed in.


Cut the butter and shortening into 1 inch-ish chunks and toss it in.


Mix it around with a fork, pastry cutter or I like to use my hands, until the fats are broken up into smaller pieces. Don't go too far. The "coarse cornmeal" texture called for in most crust recipes is too much. 


Sprinkle in the ice water, a tablespoon at a time, tossing the mixture around until it starts to hold together. Divide the mixture in half.


Form each half into a ball then flatten and wrap tightly in plastic wrap. Refrigerate at least an hour before using. The recipe makes enough for two crusts. You only need one for this recipe.


After the dough has chilled turn it out onto a generously floured sheet of waxed paper. Lightly dust the top with flour.


Roll out into a circle about 2-3 inches larger than your tart pan. Dough should be a generous 1/8 inch thick and no thinner.

Using the wax paper, gently lift the dough into a 9-inch tart pan. Fit the dough into the pan making sure it's snug into the corners, try not to stretch the dough too much. If you get any cracks or tears just repair with the excess dough from the edges. Trim the excess even with the top of the tart pan. Refrigerate until you are ready to fill.


For the filling you need: butter, sugar, salt, Dutch process cocoa, eggs, vanilla and yellow corn meal.


Start by first browning the butter: Heat the butter in a small saucepan over low heat until melted. Turn the heat to medium and cook until the butter starts to bubble and the solids sink to the bottom and brown. As soon as you see the browned bits and the mixture smells nutty, remove from the heat. Seriously watch it close, it will go from browned to burned in about 10 seconds. Let the butter cool for at least 5 minutes. This is a good time to start preheating the oven to 350°F.


This is what the browned butter should look like: just slightly brown liquid with darker brown bits on the bottom.

Add the rest of the filling ingredients, except for the corn meal,
to the melted butter and whisk into a thick batter.
(Note: The recipe lists a specific order for adding and mixing ingredients. I made two pies, one exactly like the recipe and one by just dumping all the ingredients in at once. There was no difference in the finished pie.)

Sprinkle in the cornmeal and stir just until combined.

Put the pastry lined tart shell on a rimmed baking sheet and pour in the filling. You may need to use an offset spatula to level the filling into the crust. It's just a bit thick to level on it's own.


Bake in a preheated 350°F oven for 30-35 minutes until the top has a hard crust and the filling doesn't "jiggle". Allow it to cool for a good 3 hours. It will cool faster if you take it off the sheet pan and set it on a cooling rack.


This is a rich dessert so start with fairly small slices. Serve with a dollop of lightly sweetened whipped cream for a truly delicious and traditionally southern dessert. I think Minny would be proud.

(Note: When I first tasted this pie I immediately thought of a Kellog's Chocolate Pop Tart. Then when my husband tasted it he remarked that it "tastes like a Pop Tart". So, if you like chocolate pop tarts, this is the pie version of one.)


Double Chocolate Chess Tart
(Adapted from "In Jennie's Kitchen" blog)


1/2 recipe Chocolate Pastry Crust (below)


3 T. unsalted butter
1 C. granulated sugar
1/8 t. salt
3 T. Dutch processed cocoa powder
2 eggs
1/2 t. vanilla
2 t. yellow cornmeal


Heat butter in a small saucepan over medium heat until it just starts to brown and smells nutty. Let cool.
While the butter is cooling, roll out the chocolate pastry and fit it into a 9-inch tart pan. Chill in the refrigerator until ready to fill.  Preheat oven to 350°F.
In large bowl, stir together, melted butter (including all the browned bits), sugar, salt and cocoa until well combined. Add the eggs and vanilla and whisk into a thick batter. Stir in cornmeal just until combined.
Pour filling into chilled pastry crust. Level filling using a knife or offset spatula. Set pan on a rimmed baking sheet and bake for 35 minutes until top has a hard "crust" and filling no longer jiggles.
Allow pie to cool at least 3 hours but overnight is best. Pie should be served at room temperature with a small dollop of whipped cream.


Chocolate Pastry Crust
(Yield: 1 double or 2 single 9-inch crusts)


3 C. AP flour
1/4 C. Dutch processed cocoa powder
2 T. granulated sugar
1/2 t. salt
1/2 C. vegetable shortening
1/2 C. unsalted butter
6-8 T ice water


Stir together the flour, cocoa powder, sugar and salt. Cut shortening and butter into 1/2-inch chunks and  add to flour mixture. Using your hands or a pastry cutter, quickly cut in the fats until the bits are smaller (1/4 inch). Do not overwork the dough. Sprinkle in the water, a tablespoon at a time, tossing the mixture around until it just starts to hold together. You should still see bits of fat here and there in the dough. Form into two equal balls, flatten slightly and wrap tightly in plastic wrap. Chill for a least 1 hours before rolling and lining your pie tin.

Friday, November 18, 2011

Pecan Tart


My absolute favorite pie of all time is Pecan Pie. Hands down, no debate, end of story. I inherited an adoration of Pecan Pie from my mom, a southerner. But really, it's probably the most traditional of all the Thanksgiving fare. Pecans are one of the only major nuts crops native to North America and they were a major diet staple for Native Americans as far back as the 1500's. Seriously, way back. It's a pretty safe bet that somewhere on that first Thanksgiving table there were pecans. They are the most American of nuts. 

Now, as much as I love Pecan Pie, and I really really do, I will admit that it can be a tad on the sweet side. Alright, who am I kidding, it's seriously sweet. Maybe it has to do with the sugar, brown sugar and corn syrup. Maybe? Hmm? I'm not sure. For those new to Pecan Pie, it can be a bit daunting. All that sugary gooeyness oozing out beneath the pecans. So, In order to appeal to a wider audience, I've made some slight modifications to the traditional pie and gone with a tart. I started with a regular old Pecan Pie recipe, but cut the quantities for the filling in half. I kept the original quantity of pecans but chopped them up. I know it looks pretty with all the whole pecans on the top but I think the tart turns out crunchier and is easier to cut into clean pieces if the pecans are chopped. What you end up with is all the flavors of traditional pecan pie but with equal amounts of pecans and filling. Give it a try.

Here's what you need: Your favorite recipe for a one-crust pie. (I used half of Gesine's "Perfect Puff" found here and here, seriously, it's my new favorite crust recipe.), sugar, brown sugar, salt, dark corn syrup (Please use the dark!), vanilla, melted butter, eggs and chopped pecans. You'll want to melt the butter and beat the eggs (separately of course) before you get started. Oh and you'll need an extra, separate, beaten egg white.

Line a 9-inch tart pan with the pie crust and trim the edges even with the pan.

Brush and bottom and sides of the crust with the beaten egg white. This creates a moisture barrier and prevents your crust from getting soggy.

Put everything else, except the pecans, in a bowl and mix it up good. It's really easier if you beat the eggs first. I didn't. Sometimes I do things the hard way. Sometimes I'm stubborn about it. Sometimes.

Here's what it looks like all mixed up. Make sure the egg is all mixed in, it can be stubborn. Mmmm, sugary.

Spread the pecans evenly over the bottom of the crust. The recipe calls for 1 cup but I used a bit more just to fill every space. As far as I'm concerned you can't have too many pecans, use your judgement.

Set the tart pan on a rimmed cookie sheet, just in case you get any overflow, and pour the filling over the pecans. Don't worry. Those little suckers will float to the top.

Bake in a 350°F oven for 30-40 minutes until the top is brown and the filling is set.

Here is why you use the sheet pan. You don't want that sticky mess on the bottom of your oven, do you?

Let the tart cool to room temperature, cut a serve. I like Cool Whip, 'cause I'm one of those "If it ain't Cool Whip, it ain't Thanksgiving" people. For reals, I like whipped cream, and it would be a nice compliment, I just need Cool Whip at Thanksgiving. 
Try my Pecan Tart, it's a small tweak on tradition.

Pecan Tart

Pie crust for single crust 9-inch pie
1 beaten egg white

1/2 C. granulated sugar
2T. brown sugar
1/4t. kosher salt
1/2C. dark corn syrup
1/2t. vanilla
3T. butter melted
2 eggs beaten
1C. chopped pecans

Make pie crust and line a 9-inch tart pan with removable bottom.
(This can be done a day or two ahead)

Preheat oven to 350°F
Brush inside of pie crust with beaten egg white.
Mix together sugar, brown sugar, salt, corn syrup, vanilla, butter and eggs. Sprinkle pecans evenly over bottom of unbaked tart shell. Set the tart pan on a cookie sheet and pour syrup mixture over the top of pecans.
Bake in preheated oven for 30-40 minutes until top is browned and filling is set.
Let cool completely before serving. (Can be refrigerated overnight.)

Thursday, November 3, 2011

Pumpkin Cream Pie

So it has begun, the holiday season. Now that the Halloween decorations are packed away and costumes are dismantled, cleaned and stored, it's time to start planning for Thanksgiving. That glorious holiday of glorious food. Some of my favorite foods appear this time of year. Pies, stuffing, potatoes, gravy. Oh my! Laden with fats and starches, sugar and cream and such goodness. And calories. . . calories schmalories. Who cares! We're just about as far away from swimsuit season as we can get. So live a little. Now if calories, fat, cream, sugar, starch, more starch, more sugar, more cream and calories (did I already say calories?) scare you then you've been warned. For the next two months this blog is going to be all about holiday indulgences. So jog an extra lap around the track or do 20 more minutes on the exercise bike, what ever you need to do (Me? I just wear bigger pants.), just don't miss out on these treats!

To kick it off, I selected one of my favorites: Pumpkin Cream Pie. If you love all things pumpkin, as I do, then you are going to love this pie. It's a lighter version of the traditional pumpkin pie. And when I say "lighter" I mean texture and flavor, certainly not calories. I don't even dare to guestimate that. I love it because first of all it tastes great. It freezes really well so you can make it well in advance of Thanksgiving, saving mucho time. Lastly, it's a great way to introduce Pumpkin Pie to kids. I really don't know many kids who like pumpkin pie, I didn't. It's just so squashy, kinda dense. This is much less overwhelming both in taste and texture. More akin to Chocolate Cream or Banana Cream. Take a slight departure from tradition this year and give it a whirl.

The players: An 8-inch graham cracker crust (you can make your own if you want, but these pre-made store-bought ones are just so convenient and seriously, who can tell?), unflavored gelatin, a can of cream cheese or vanilla frosting (I like the cream cheese. DO NOT use a "whipped" frosting.), sour cream, canned pumpkin, pumpkin pie spice, and an 8 oz. tub of non-dairy whipped topping (i.e. Cool Whip).

Here is the most complicated part of this recipe. Ya ready for it? OK! Dissolve 1 teaspoon unflavored gelatin in 2 tablespoons water. You can either stir the gelatin into hot water or stir the water and gelatin together and microwave on high for 15-30 seconds. WATCH IT CLOSE. It will boil over very quickly. The main idea is to get the gelatin totally dissolved, no grainy bits. Set this aside and let it cool to room temperature. You don't want to add it to your filling if its warm.

Next dump the rest of the ingredients into a large mixing bowl, using just 1 cup of the whipped topping.

Here is where most people go wrong with this recipe. Even though the recipe says 1 CUP of pumpkin it's often misread as 1 CAN. Then their pie is totally runny and doesn't hold together. So remember it's 1 CUP of pumpkin. ONE CUP. O-N-E C-U-P! Don't forget it!

Using a hand mixer or just a whisk, get it all blended together. You're not really trying to whip air into it, just get it all smooth and blended. Once it's well blended whisk in the gelatin mixture and again mix well. Do this fast, I suggest using a hand mixer. If your ingredients are cold and you don't whisk fast enough you'll get little gummy bits of gelatin in your pie.

Pour the filling into the pie crust and smooth the top. Refrigerate for a couple of hours for the filling to set up.

Top the pie with the remaining whipped topping and serve. If you want to be clever you could sprinkle the top with a little pumpkin pie spice or just leave it as it. I'm going to freeze this pie until Thanksgiving (and yes, you can do that, this pie is perfect to make ahead.).

Ahhh, Pumpkin Cream Pie. A delicious, light and creamy alternative to traditional Pumpkin Pie. Enjoy!


Pumpkin Cream Pie

1 8-inch graham cracker pie crust
1 t. unflavored gelatin
1 16 oz. can vanilla or cream cheese frosting (not the whipped variety)
1 C. sour cream
1 C. canned pumpkin
2 t. pumpkin pie spice
1 8oz. tub frozen non-dairy whipped topping (divided)

Dissolve unflavored gelatin in 2 tablespoons water. Watching carefully, heat in microwave on high for 15-30 seconds until it just starts to bubble and no grains of gelatin remain. Set aside and let cool to room temperature.

Add frosting, sour cream, canned pumpkin, pumpkin pie spice and 1 cup whipped topping to a large mixing bowl. Using a hand mixer, mix on medium speed until well combined. With the mixer on low, and working quickly, stream in the gelatin mixture and mix well.

Pour filling into crust and top with remaining whipped topping. Refrigerate several hours or overnight before serving. Pie can be frozen.

Friday, August 5, 2011

The Basics: Pie Crust Perfected

Over the years I've struggled with making a decent pie crust or pastry. I've found a few recipes that have gotten me by and I've tried many more. Ones that use butter exclusively. Ones that call for only shortening. Ones calling for various combinations of both. Some claim adding vinegar makes for a tender crust. Some suggest buttermilk. Others say using a food processor is the best technique. Then some say don't. Cornmeal and cheddar cheese have cropped up in a few, along with a myriad of ingredients. It's all so confusing. Where to begin?

How do I sift (nice pun eh?) though all the recipes and find the perfect one. I guess I should start by deciding what I want in a pie crust. My preference is a crust with light, buttery, flakey layers. Kind of a modified puff pastry. A bit sturdier though, to stand up to the heft of the filling. So once again I found myself poking around on Gesine's blog: Confections of a (Closet) Master Baker. There I found her recipe for Quick Puff. It was such a simple recipe, could it deliver? I gave it a try and EUREKA! It was perfect. I learned the secret to buttery, flakey, light pie crust: simple ingredients and technique. Give it a try. It doesn't call for sugar so it will work great with either sweet or savory pies. I cut the recipe in half and it was plenty for a full double crust 9-inch pie. But, as long as your taking the time, why not make the full recipe, divide the dough and freeze for later. Save some steps down the road.

Don't forget to go poke around Gesine's blog and check out her books. She got a great wry humor and a refreshing perspective on cooking. 

Let's get started. . .

Here's all you need: flour, butter (I always use unsalted.), salt and water. Simple!

Use a scale to weigh out your flour. For serious baking weight usually trumps volume.
This digital version by Salter has served me well over the years.

Cut the butter in 1-inch-ish chunks and toss them in a big bowl with the flour.

Use your hands to mush it about breaking the butter down into smaller chunks. You're not looking to get all the flour completely incorporated and you certainly don't want the texture of "course meal" like many pie crust recipes want. Just get the butter broken down a bit. You want some chunks. Trust me.

Like this is just fine. Chunks of butter, coated with flour and
some extra flour in the bowl.

Add the water and toss it around until it just starts to clump together.
It's going to be lumpy.

On a VERY VERY GENEROUSLY floured surface, form the dough into a rough square. Now walk away and let it rest. A good 10 minutes or more.

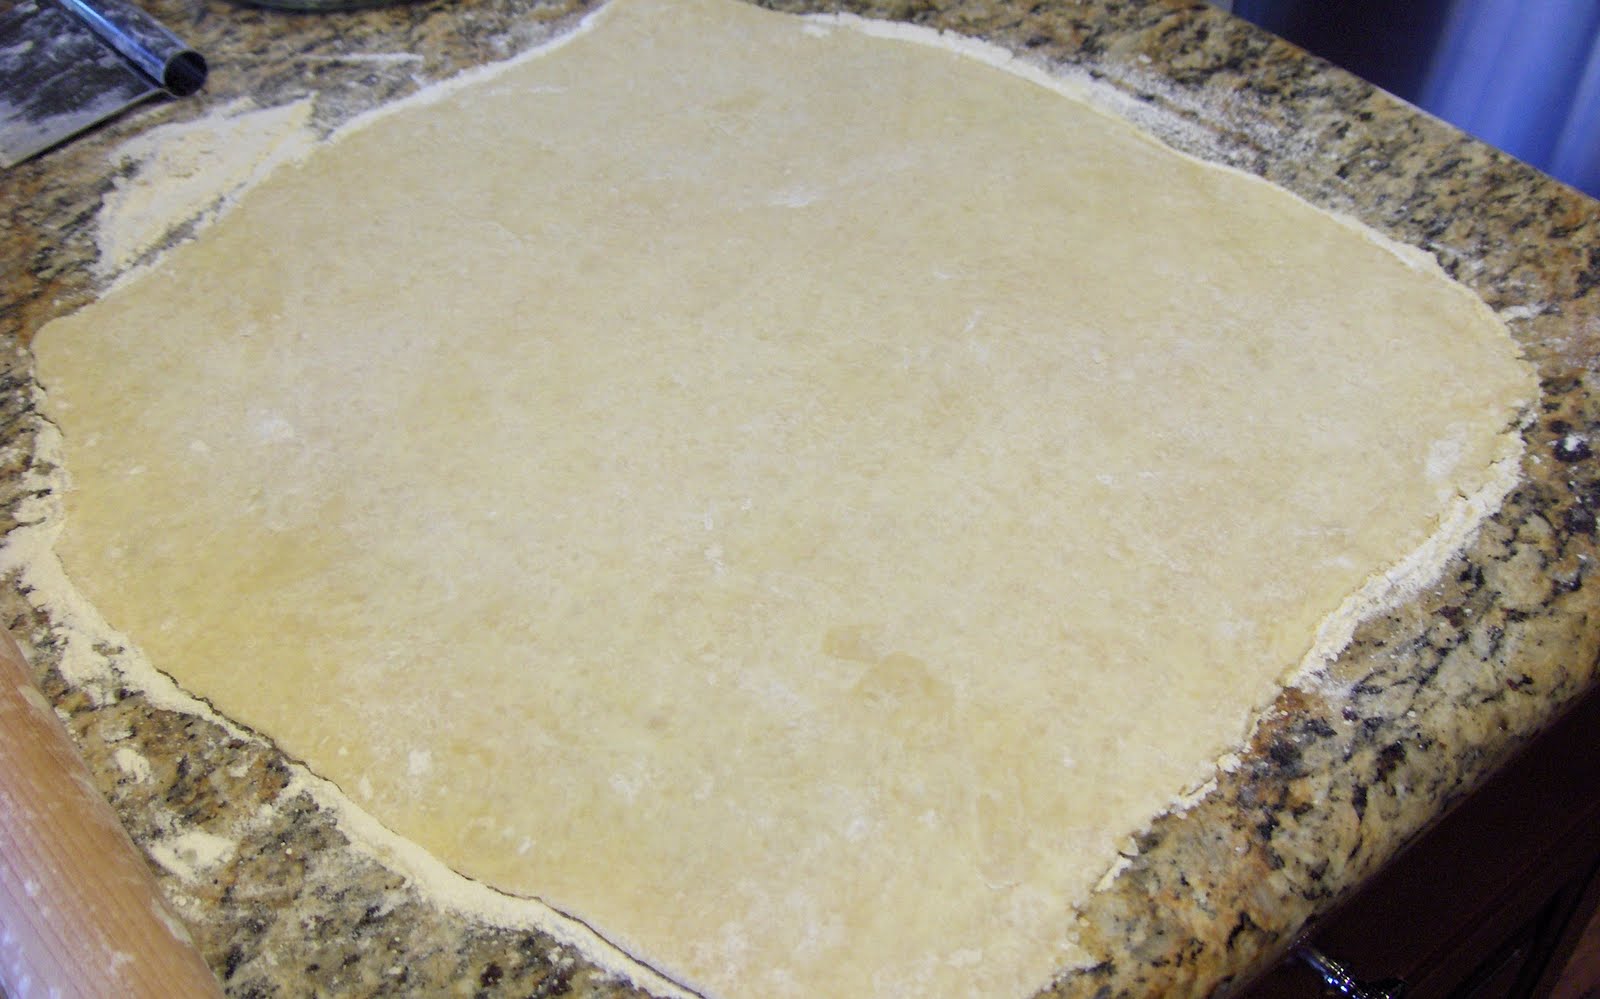
Once it's rested, generously flour the top and roll into a rectangle. It may fall apart a bit, don't worry. Just stick the loose chunks back on and keep going.

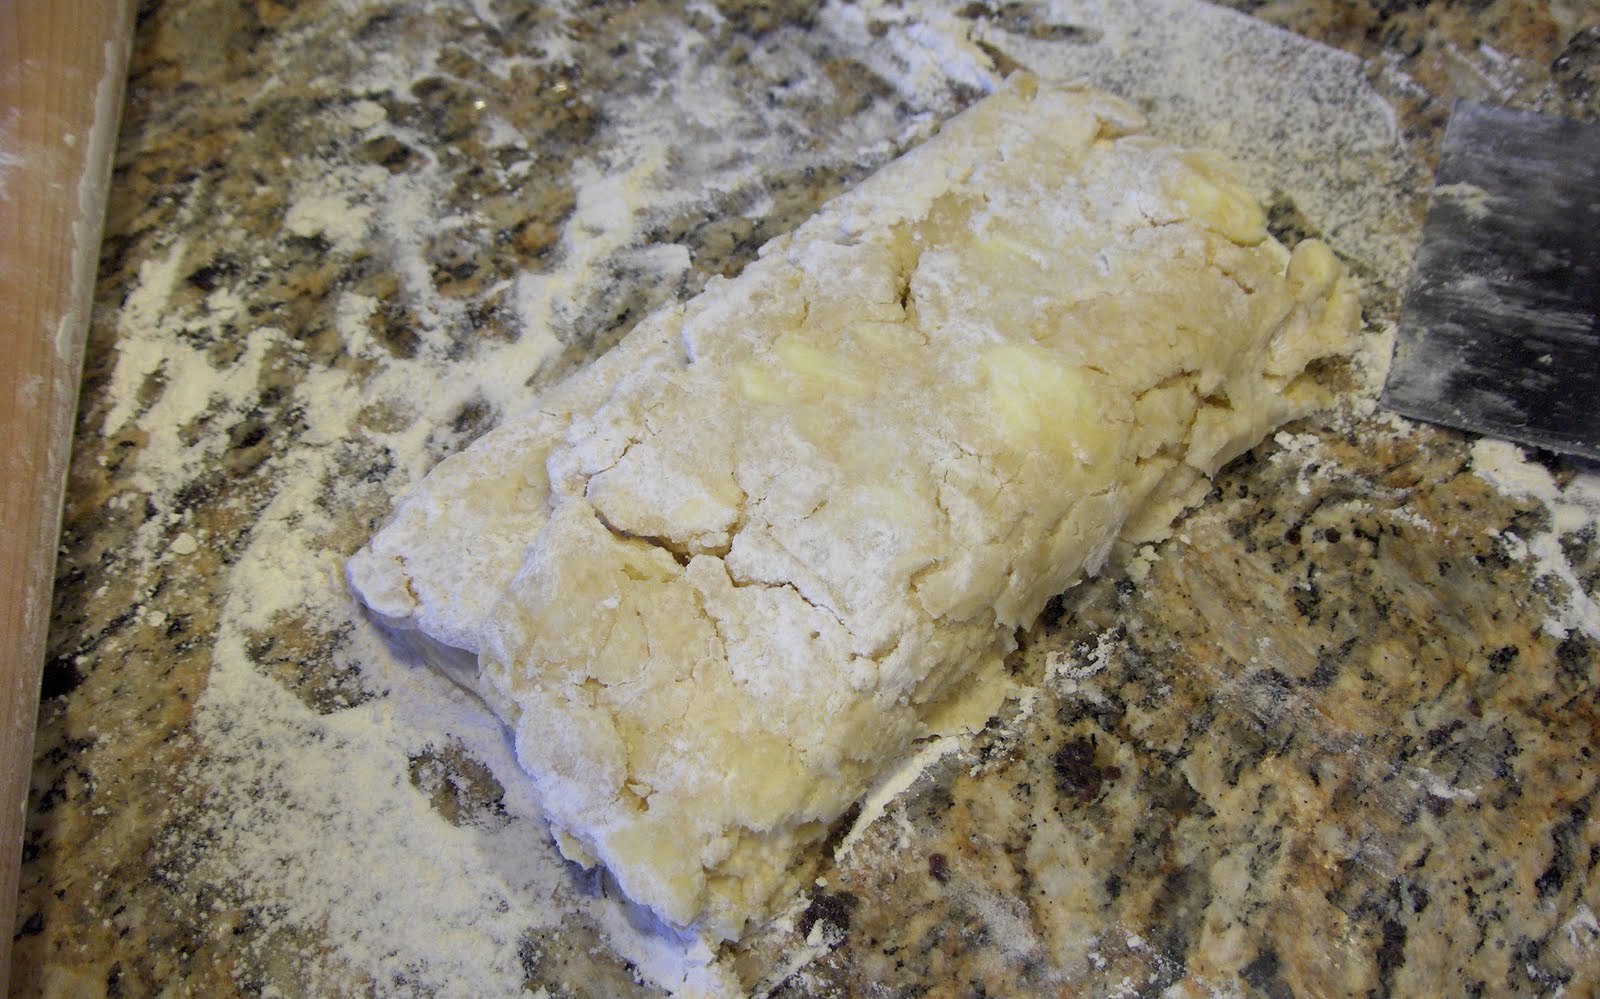
Use a pastry scraper to flip 1/3 of the dough on top of itself.

Now flip up the other side on top. Like you're folding a letter. Again, bits and chunks may fall off, just stick them back on.

Turn the whole mess 90 degrees and give it a liberal sprinkling of flour. Roll it out again to a rectangle. 

Repeat the folding 3 more times keeping everything generously dusted with flour. Your finished dough should look like this. It will have come together more smoothly and resemble pie dough.

Let it rest a bit and then roll out as you would for any pie or recipe that uses pie dough. Or divide it up, wrap tightly and put in the freezer until your ready to make pie.

Here again is the link to the recipe. Remember as shown above I made 1/2 the recipe. Practice up, pie season will be here before you know it.