Monday, September 26, 2011

Crepes

Crepes are one of those culinary anomalies that seem really fancy and complicated but are actually quite simple. For the crepe itself you most likely already have all the ingredients in your pantry. Now what you choose to fill them with is entirely up to you. They can be sweet, the option we choose most, or savory. They can be a breakfast, a main dish or a dessert. Once you master the basic recipe and technique you are only limited by your imagination. I like mine filled with jam, my daughter prefers Nutella. On the savory side, a seafood filled crepe with a Beurre Blanc sauce can't be beat.

Now, yes, the ingredients are simple but it's really the equipment that guarantees success. I'm actually not a big fan of single-tasking kitchen equipment but when it comes to crepes the right pan makes all the difference. You can use a small skillet, but, if you think you'll be making a lot of crepes in the future, I highly recommend getting a crepe pan. There are lots of crepe making gadgets out there but really all you need is a French Steel Crepe Pan. They are similar to a cast iron skillet in that you have to season it first before you use it and PLEASE never wash it with soap. I don't really ever wash mine. I just wipe it with a dry paper towel and then coat it with a very thin layer of vegetable oil and store it between paper towels. 

Don't get discouraged on your fist attempt. I tore, overcooked, undercooked and mangled quite a few crepes before I found what works with my stove and pan. But stick with it, it's like riding a bike, once you get it, you get it. Get it? Ok, so arm yourself with the right equipment, some mental fortitude and the ambition to master crepes and go forth and crepe! Allons-y!

Here's what you need: milk (I'm using whole milk here because I had it, but, I usually use non-fat. Use what you have.), eggs, flour, sugar (eliminate the sugar if you are making savory crepes.), melted butter and vanilla (again, eliminate it if you are going the savory route.).


Mix all the ingredients well. I like using a blender but you can use a food processor or whisk it by hand, just get it all well mixed without any lumps of flour. Pour into a container with a lid, cover and refrigerate 2-3 hours or overnight. I usually make my batter the night before.


Get your equipment ready. A 1/4 cup measuring cup (I use this ladle which holds 1/4 cup.) A thin flexible spatula and a french crepe pan. You also need a way to lightly oil your pan between crepes. I like using a folded paper towel "dabber" and a small bowl with about 2-3 tablespoons of veggie oil.


Heat your pan over medium heat. Use the paper towel "dabber" to coat the crepe pan with a very thin layer of oil. Next, holding the crepe pan off the heat in one hand, pour 1/4 cup of batter into the center of the pan. Tilt/swirl the pan until you have a thin layer of batter covering the entire bottom of the pan. Work quickly as the batter will begin to cook as soon as it hits the pan. Put the pan on the heat and gently cook until the surface of the crepe looks dull, no longer wet and shiny.


To flip the crepe, gently work the spatula all the way around the edge of the crepe to loosen it. Then slip the spatula under the center of the crepe. Gently lift and flip it over. Just cook it about 30 seconds after flipping.


Take the pan off the heat and gently slide the crepe onto a plate to cool. Now perfectly made crepes aren't supposed to have browned spots and crispy dry edges. Mine do. I'm not worried about it. It took me a while just to perfect the crepe making technique to this point. Someday I try an take it to the next level, but not today. I'm not going to lose any sleep because my crepes have crispy edges and brown spots, once they are filled and topped no one will even notice or care.


Repeat the cooking process until you are out of batter; oiling the pan between each crepe. Stack them up on a plate to keep them warm. They don't tend to stick to one another because of the butter in the batter and the oil in the pan.


You can use the finished crepes for all sorts of recipes. For a quick breakfast we usually spread them with jam (apricot here). Roll them up and sprinkle with powdered sugar. Yum!


Oh la la. C'est magnifique.

Here is a link to a savory crepe recipe by Lou Seibert Pappas. For the sweet crepe recipe (like I made), scroll down to the bottom of the recipe link and click on "Dessert Crepes".

Sunday, September 18, 2011

Salisbury Steak


A couple of months ago, for some unknown reason, I constantly though I needed ground beef. So whenever I went to Costco I got ground beef. Only to return home to find that I had ground beef. This happened several times and I ended up with a lot of ground beef in the freezer. I've done this before. One summer I was constantly under the impression that we needed mustard. By the end of the summer we had enough yellow mustard to last two years. Hmmm, wonder why that happens? Maybe its a condition. Maybe there is some obscure word for it. Maybe I don't want to know. Anywho, I ended up with a lot of ground beef.

After making plenty of spaghetti sauce with meat, hamburgers and meatloaf I'd run out of ideas on how to use up the ground beef. So I did the obvious, I Googled "ground beef recipes". Lots of stuff came up but Salisbury Steak leap out at me. After all, I was a child in the 70's and I had a mom that didn't particularly like to cook. Not that she couldn't cook, in fact she was a pretty good cook. She just didn't enjoy it. Perhaps it had something to do with my dad being an airline pilot and being gone 3 or 4 nights a week. Or maybe she just didn't want to clean up all the mess. Who knows, the point is, as a child I ate my share of TV dinners. Heavy in the rotation was Salisbury Steak. It somehow was the best choice, not that it was actually a steak but it did have "steak" in it's name. What it was, was a hamburger-esque patty covered in dehydrated mushroom gravy. It sat nestled in it's triangular foil compartment with watery mashed potatoes to the left and rubbery cubed veggies to the right. If you were lucky, there was some sort of brownie or cobbler right in the middle that you had to carefully peel back the foil on before cooking. Ah, those were the days. So in homage to my childhood and my mother I had to try my hand at Salisbury Steak. I read through several recipes and came up with this gem. Enjoy!

Get your ingredients ready: Condensed French Onion Soup, ground beef, dry bread crumbs, an egg, salt, pepper, AP flour, ketchup, worcestershire sauce, mustard and sliced mushrooms.


Start by putting the soup in a blender and blending it up until smooth. Measure out 1/3 cup and set it aside.


To the remaining soup in the blender, add the flour, ketchup, water, worcestershire sauce and mustard. Blend until smooth and set aside. 
This sauce definitely has a hint of ketchupy flavor. If you don't like that then by all means back off on the ketchup a bit, or leave it out all together and/or replace it with tomato paste. Make it your own.


In a large bowl mix together the reserved 1/3 cup blended soup, ground beef, bread crumbs, egg, salt and pepper. The easiest way to do this is to get your mitts in there. Clean them first, of course, but to get it well mixed together a spoon just isn't going to cut it.


Divide it into 4 equal portions.


And shape them into oval patties about 1/2-inch thick.


Brown them up, on both sides, in a skillet set over medium-high heat. Spoon off any excess fat.


Turn the heat to medium low and pour the sauce mixture over the meat. Lift the patties up so the sauce runs underneath. Then toss the mushrooms on top. Cover and simmer 20 minutes stirring occasionally.


There you have it. Salisbury Steak. A quick easy, "Old School", weeknight dinner and a great alternative use for ground beef. Enjoy!

Salisbury Steak 
1 (10.5 ounce) can condensed French onion soup 
1 pound ground beef 
1/3 cup dry bread crumbs 
1 egg 
1/8 teaspoon salt 
1/8 teaspoon ground black pepper 
2 teaspoons all-purpose flour 
2 tablespoons ketchup 
2 tablespoons water 
2 teaspoons worcestershire sauce 
1 teaspoon mustard
4-6 oz. mushrooms, roughly chopped

1. Blend soup until smooth. Reserve 1/3 cup.
2. To remaining soup add flour, ketchup, water, worcestershire sauce and mustard. Blend until smooth, set aside.
3. In a large bowl, mix together reserved 1/3 cup condensed French onion soup with ground 
beef, bread crumbs, egg, salt and black pepper. Shape into 4 oval patties. 
4. In a large skillet over medium-high heat, brown both sides of patties. Pour off 
excess fat. 
5. Pour sauce over meat in skillet. Add mushrooms. Cover, and cook for 20 minutes, stirring occasionally. 
Serves 4

Saturday, September 10, 2011

RIBS!


I made ribs for Labor Day Weekend. I realize that I should have made ribs before Labor Day Weekend. Then I could post how to make ribs and you could make them for Labor Day Weekend. Alas, hindsight is 20/20 but my foresight isn't. My foresight needs serious coke-bottle glasses. 

Anyway. . . its ribs and they're great, so who needs a holiday as an excuse to make 'em? I'm really not sure if this is the way you are supposed to make ribs and well I just don't care. They turn out awesome. So if some BBQ Expert wants to dis my rib cooking technique, just go for it. I'll try to ignore them as I wipe the deliciousness from my chin. No recipe here, it's not that complicated; just some simple easy steps. And, the best part is, you don't even need a grill.

Here are three of the four ingredients you need: Season Salt (any brand will do, use your favorite.), beer (just one bottle, minus a sip because I really need to make sure it's good beer. And again, use whatever you like or have on hand.) and pork ribs (baby backs, spare, I just get whatever they have at Costco on the cheap. 2 racks will do.)

Get yourself a large roasting pan. I like the disposable kind you use for Thanksgiving. A lot of "stuff" drips off the ribs and it's kind of grody and the pan makes it easy to just throw the whole mess away. Season the ribs generously on both sides with the seasoned salt. Lay them in the pan, and pour the beer into the bottom. The beer is that yellow liquid that looks like. . .nevermind, just pour it in. Pour it on the side, not over the ribs so you don't "wash" off the seasoning.

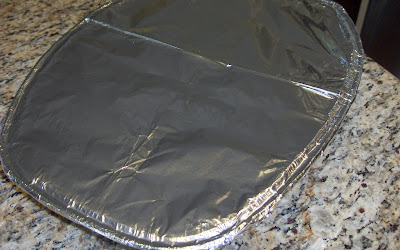
Cover the top tightly with foil. Make sure it's a tight seal. You don't want any of the moisture to escape. Put it in a 325°F oven for 2 hours. Just walk away and let it be.

After 2 hours, take them out of the oven (leave the oven on) and transfer the ribs to a foil lined cookie sheet.  Baste with your favorite barbecue sauce. I didn't even show the sauce because I mixed together the remnants from several bottles of various brands of sauce lurking in my fridge. Point is, use what you like or have. Bottled sauce suites me just find but if you have a favorite homemade recipe use that. Oh and BTW send me the recipe. Put the ribs back in the oven for 10-15 minutes. Just to bake on the sauce. You can do this on a grill if you like but I find the oven works just fine. If you like a lot of sauce you can repeat this step but only go 10 minutes at a time.

This is what they look like all finished. YUM! Juicy, tender, delicious.

Hey, didn't football season just start? What's better for watchin' the game than ribs. So cook up a rack of ribs next Sunday, call up some friends and EAT!

Monday, September 5, 2011

Graham Crackers


Graham crackers?
Yes, graham crackers.
Really, graham crackers?
YES, graham crackers.
Graham crackers, huh?
YES, GRAHAM CRACKERS!

I know, I know. Seems kind of odd, maybe a little boring, graham crackers. I mean, they're pretty good right out of the box. Why would you need to make them? Well, my reasons are few but meaningful. 

First, I was stumped this week on a blog post. I usually take pictures whenever I cook or bake and even if I haven't made something a particular week I have a post or pictures "in the can" so I can post weekly. Well this past week that just didn't happen. Somehow I was caught up on posting all the various things I've made. There I was, no pictures, no recipe, nothing to make. So I did what I do whenever that happens and turned to my "recipes to try" file. One of the first things I came across was graham crackers, so I though "What the heck." I'll make graham crackers.

Second, I've been looking, off and on, for some time, for a recipe for homemade graham crackers. I've been knocking around an idea for a treat in which I'll need graham crackers of a particular size and shape. Upon googling it I found tons of recipes. However, with all that there was on the web, there doesn't seem to be any consensus on what makes a graham cracker a graham cracker. I finally settled on this recipe from Smitten Kitchen. Now Smitten Kitchen isn't a blog I read with any sort of regularity but I have poked around on it from time to time. It does however seem to appear on the "blog roll" of many of my favorite blogs so I thought "What the heck." I'll give it a try.

And so, long story short, Graham Crackers:

Get your ingredients together: AP flour, dark brown sugar, baking soda, kosher salt, unsalted butter, honey, whole milk, vanilla and (not shown) cinnamon and sugar.


Start by cutting the butter into chunks and parking it in the freezer.


In a food processor, pulse together the flour, brown sugar, baking soda and salt.


Add the super cold butter chunks.


And pulse until it resembles coarse meal.


Whisk together the honey, milk and vanilla. 2 whole tablespoons of vanilla. I though this was a misprint but I went with it and since the end result tasted just like a graham cracker, it must be right.


Add the liquid mixture into the food processor and pulse just until it comes together. It will be very soft and very sticky.


Dump it out onto a well floured piece of wax paper. The recipe says plastic wrap but I went with wax paper because I think in the realm of food wraps that wax paper gets no respect. I also constantly wrestle with plastic wrap. I just can't seem to tear off a nice flat piece without it sticking to itself and then spending half an hour trying to straighten it out. It's an issue with me, I'll seek help.


Pat the dough out into a rectangle that is about 1 inch thick. Then wrap it tightly, in plastic wrap or a zipper bag and park it in the fridge for at least 2 hours. I went overnight.


When you are ready to bake. Cut the rectangle in half. Put one half back into the fridge. Put the other half on a well floured surface and roll it out about 1/8-inch thick.


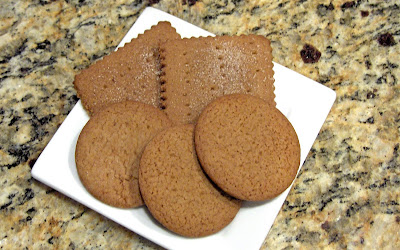
Here's where I veered away from the recipe. I cut the dough into 2-1/2 inch circles because this was the particular size and shape I needed for my "idea". (More on that later, stay tuned!) I did NOT sprinkle these with the cinnamon sugar mixture.


I also went ahead and cut some more traditional squares but again, I didn't go with the recipe directions I just kind of eyeballed it. These ones I did sprinkle with the cinnamon sugar mixture.


They went back into the freezer for about 20 minutes. Then I pricked them with a fork and baked them for about 18 minutes in a 350°F oven. I just put them on the middle rack, one pan at a time. The recipe suggests differently. Use your own judgement.


Here are the square ones just out of the oven. Let them cool completely and store in an airtight container. There you have it, homemade graham crackers.


Here is the link again to the recipe. They do taste exactly like graham crackers. Are they better than store bought? Hmmm, I guess, maybe. They are slightly crispier and that's the most significant difference. Honestly, I probably won't make them again just as graham crackers and I certainly wouldn't make them only to crush them up for a pie crust.  But, for my "idea" needing a certain size and shape of graham cracker, they'll work perfectly.