Showing posts with label Candy. Show all posts

Saturday, February 22, 2014

Peppermint Patties


I love Peppermint Patties. So creamy, cool and snappy. They're a nice finish when you're looking for a little something sweet after dinner but not wanting to go for a big dessert. I usually have some around, hidden in the pantry or out in a candy dish, depends on my mood. When I saw some recipes on the old interweb for a home made version, my mind was swimming with possibilities. I usually don't go in for "copycat" candy recipes because, seriously, they are a lot of work and have a lot of components. I can spend all day in the kitchen or just run down to 7-11 a grab a Snicker's. A lot of work for not much payoff, no thanks. On the other hand, the peppermint patty recipes looked pretty simple and I usually have all the ingredients on hand. I decided I'd give 'em a try.

Wednesday, October 2, 2013

Maple Pecan Fudge


I'm not feeling a long winded wind up to this recipe so I'll just get right to it. I love fudge. I love heading up to Apple Hill in the fall and getting a lovely sampler box of fudge. I love all the variety and flavors, Cappuccino, Cheesecake and Cherry Chocolate being among my favorites. But really, with fudge, what wouldn't be a good flavor? I like 'em all and for some time now I've been looking for a good, creamy, homemade fudge recipe that does NOT use marshmallow cream. Don't get me wrong, I like the "Fantasy Fudge" recipe from the back of the marshmallow cream jar but somehow, using the marshmallow cream feels a bit like cheating. Don't know why. No judgement here, I've used that recipe several times and welcome with open arms any gifts of Fantasy Fudge. I just kind of wanted to go deeper into fudge making. Making it the old fashioned way. So I came across the collection of fudge recipes at Thibeault's Table and as I just so happened to come in to a large jar of real maple syrup, I thought I'd try the Maple Cream Fudge recipe. Check it out. . .

Tuesday, February 12, 2013

Toffee Sticks


I was going to title this post "Valentine's Day Quickie." Then I re-thought that. Hmmmm, no double entendres for this family friendly blog. So, I went with Toffee Sticks. Which, by the by, are super duper easy. And, quick. If for you, like me, Valentine's Day has crept up on you and you're totally unprepared, you can whip up a batch of these in no time. If you followed the Oreo Cookie Pops post and/or the Chocolate Caramel Pretzel post, then you totally know what you are doing here. Just dippin' stuff in Chocolate. . .

Friday, December 21, 2012

English Toffee

When I was a kid, my mom's favorite candy was Almond Rocha. The distinctive pink round tin, the little gems of butter, almonds, chocolate and sugar wrapped in gold foil. They were so fancy to this suburban kid. Any it was expensive, or so my mom said. So every once in a while, she'd splurge and buy some, and stash it somewhere to be enjoyed solo. A private moment of indulgence, just for her. And then. . . one day. . . I found her stash. And as much as I'd like to say "I didn't", I did; I pilfered one and scarfed it up. Then expertly disposed of the damning gold foil evidence. So tender, so buttery, so forbidden. I was hooked. I was instantly an "English Toffee Junkie". But to feed my new desire, I would have to be careful. If I pinched it all, I'd be caught. So I waited, and waited before pilfering another piece. Never letting on that I'd found the stash. Oh the cleverness of me. Eventually I quit lifting from mom's stash. A little maturity and a lot of guilt bettering my addiction. I wonder if my Mom every knew. She may have and never let on. We'll never know. Mom was like that. I miss her!

Imagine my delight when my friend Amy shared her grandma's family recipe for English Toffee. I could now make this once forbidden treat for myself. What I love about this recipe is it's simplicity. Just a few ingredients and some patients and you'll have English Toffee for yourself. It's getting close to Christmas but it's not too late to whip up one last batch of treats. . .

Wednesday, October 17, 2012

Chocolate Caramel Pretzels


I love sweet things. . .
I love salty things. . .
I love chocolate things. . .
I love caramel things. . .
I love salty, sweet, chocolaty, caramely things that are super easy to make and festive.
I love this recipe/project.

These Chocolate Caramel Pretzels fall into the same category as the Oreo Cookie Pops. Super duper easy to make but impressive. I call it a project as much as a recipe because you're really just putting stuff together. There are a lot of chocolate dipped _________ (fill in the blank) projects out there on the web but I like to take these pretzels a step further and add caramel. Sure I like chocolate, who doesn't? And a Chocolate Dipped Pretzel is the perfect marriage of chocolate, salty and bread. But . . . add caramel and they are out of this world. As far as I'm concerned, you could put caramel on just about anything and I'd eat it. It amazing how you just apply heat to regular old sugar and it becomes caramel. A true miracle. Well actually it's science, but I prefer "miracle". 

You can customize these with any combination of chocolate (or colored Wilton Candy Melts) and sprinkles for any occasion. Since it's October, I went with Halloween. Change it up and make it your own.

Tuesday, September 4, 2012

Caramel Pecan Popcorn


A funny thing happened on the way to make Caramel Corn. I didn't have any light corn syrup. Seriously, how could I be out of light corn syrup. I always have some. Better put it on the grocery list. What I did have is 3 bottles of dark corn syrup. Why? Don't ask me. I must have forgot I had some and then bought more. Then I thought: "Can you make caramel corn with dark corn syrup?" Why not? Then dark caramel corn made me think of Pecan Pie. Mmmmmm, Pecan Pie! Wait . . . hold on . . . I'm getting an idea . . . Caramel Pecan Popcorn! Yes, I always have pecans. I double checked the freezer and there they were. So Caramel Pecan Popcorn it is!

Monday, February 13, 2012

Two Ingredient Fudge


I've been perusing a lot of cooking blogs as of late and have discovered some new ones. My "recipes to try" file is seriously getting out of control. When my exploration led me to this recipe my interest was piqued. Seriously, "Two Ingredient Fudge". I had to try it. The super cute pink hearts certainly had something to do with it. To say I was skeptical is putting it mildly. It really couldn't be that easy. Two ingredients? I mean really, two ingredients? Could fudge be that easy? Have I been putting way too much effort into it all these years? I simply had to try it out. Here's how it went. . .

OK, I know, I said 2 ingredients and I'm showing 3. But, the sprinkles aren't really part of the recipe. What you do need is a can of frosting and a bag of chocolate chips.

Spray a 9x9 pan and line with a double thick strip of waxed paper. Spray the waxed paper as well. This will help you lift the fudge out of the pan in one big piece.

On the top of a double boiler (or in the microwave) melt the chocolate chips.

When they are all melted and smooth, remove from the heat.

Add the entire can of frosting and stir until both ingredients are completely combined.

Pour into the prepared pan and smooth flat. If you want to use sprinkles put them on before the fudge is set. Put the pan in the refrigerator for at least a 1/2 hour to set up.

Here is the chocolate (much tastier) version. Run a knife around the edge of the pan to loosen the fudge. Pull up firmly on the wax paper to remove the fudge from the pan. Use a sharp knife to cut into squares or use a cookie cutter for festive shapes.

OK so my kids and husband liked both flavors but preferred the chocolate. Me, they were both a bit sweet and the strawberry was way, way too sweet. But, to be honest, I don't really care for the strawberry frosting to begin with. And, really, I'm not big on fudge. That being said, the texture was pretty fudge-like and you can't beat how easy this recipe was. (Let's just not think about all the funky stuff in canned frosting. YIKES!) It would be great for a Girl Scout or Boy Scout cooking project, a camping trip or an in-class demo for grade schoolers. The combinations of "chips" and frosting are endless: peanut butter chips and chocolate frosting, butterscotch chips and vanilla frosting, etcetera, etcetera, etcetera. All and all I give this recipe a 10 for ease of preparation and a 7 for taste. 


Me, I'll probably stick to the Fantasy Fudge recipe on the back of the marshmallow fluff jar. But, if you need a quick and easy treat for Valentine's Day, give it a whirl.


Here is a link to the post where I got the recipe.

Tuesday, November 29, 2011

Peppermint Marshmallows


Chocolate? Peppermint? It must be Christmas. Yahoo! The season is here and it's one of my favorites. And on the subject of favorites this here recipe is one of my kids' favorites. Seriously, as far as they're concerned, it's not Christmas if I don't make these. One year I hadn't planned on making them and I almost had a revolt on my hands. But luckily, these are very easy to make and I was able to quell the revolution. So, difficult? No. A bit time consuming? Yes.  There are a lot of steps and there is some waiting time, so I'll dispense with a lengthy introduction and get right to it. . .

Here's what you need: unflavored gelatin, granulated sugar, light corn syrup, salt, peppermint extract, candy canes and powdered sugar. You'll also need semi-sweet chocolate chips and shortening. (But I forgot to show them. Oops!)


Start by crushing up 5 or 6 regular sized candy canes. I "triple bag" them and use a meat tenderizer. I highly recommend the "triple bag", those little shards can get sharp and easily cut through just one bag. Then you have a real sticky mess on your hands.


There you have it, crushed candy canes. Cover them until you need them.
They tend to absorb moisture out of the air and start to clump up quick.


Next, set a 8x12-inch pan on a rimmed cookie sheet and dust liberally with powdered sugar. Get a good layer going. You shouldn't be able to see the bottom of the pan.
I really like the disposable pans from the Dollar Store for this. Just makes it easy!


Put the gelatin and 1/2 cup water in the bowl of a stand mixer and let set for 30 minutes to soften.


While the gelatin is softening get your sugar syrup going. Add the sugar, another 1/2 cup water, corn syrup and salt to a saucepan. Stir over low heat until the sugar is totally dissolved.


Wash down the sides of the pan with a wet pastry brush.
Don't skip this or you'll get grainy sugar syrup.


Clip on a candy thermometer, raise the heat and cook to the "firm ball stage" (244°F) without stirring. This may take a while. Be patient! I love this digital thermometer. If you are going to do any serious candy making, I highly recommend it.


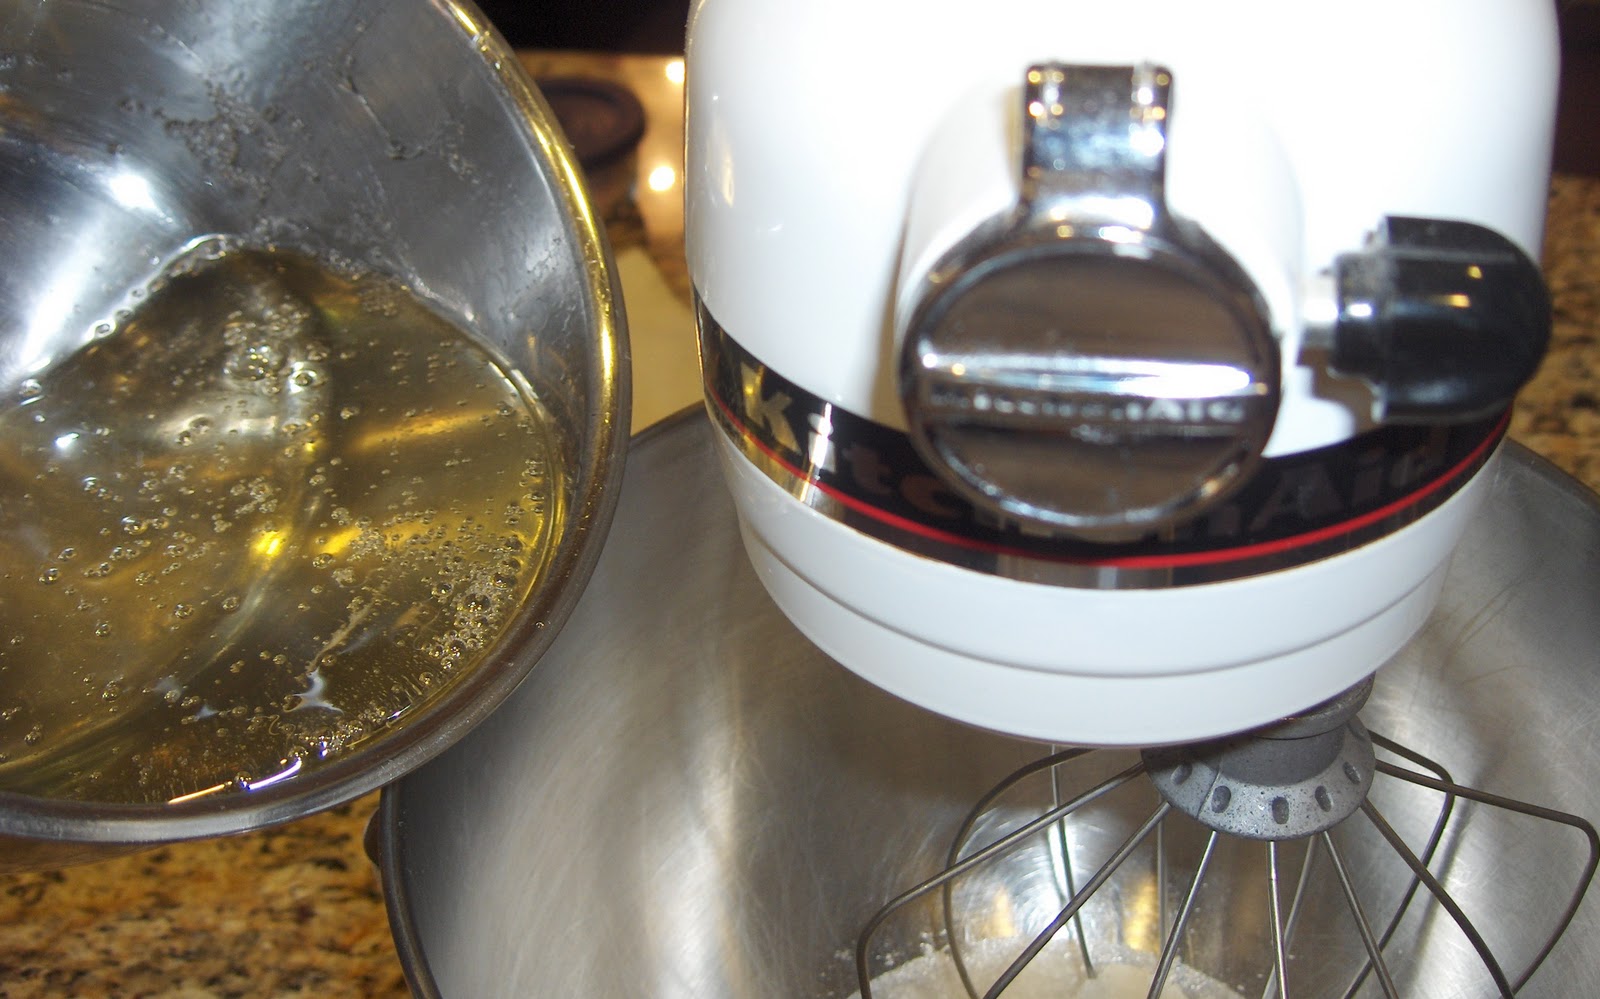
When the sugar reaches 244°F immediately remove it from the heat. Fit your mixer with the whisk attachment and turn it on low. Slowly pour in the hot sugar, running it down the side of the bowl, avoiding the moving whisk. If it hits the whisk it will fling hot sugar all over. Not fun!


Once the hot sugar is all in and has melted the gelatin, set the mixer on high and whip it until its thick, white and almost 3 times its original volume. This is not thick, white or tripled in volume.


This is. Yea. Add the peppermint extract and beat to incorporate.
Add the crushed candy cane and stir until evenly distributed.


Pour the mixture into your prepared pan. The candy cane will turn it a lovely shade of pink with little red flecks. I love it!


Wet your hands and pat it evenly into the pan.


Dust the top with more powdered sugar and let set out overnight, uncovered, to dry out.


Turn it out onto a cutting board. You may need to loosen it up a bit from the sides of the pan.


Use a very sharp knife to cut 1-inch squares. If you have trouble with the knife sticking, run the knife under hot water, dry it off and then try cutting.


Toss the squares with more powdered sugar.


And set them on a sheet to dry out the edges. I let them dry overnight again. That pile there in the corner is all the "scraps". I like really straight sides so I trim off the edges before cutting into squares. I have no trouble finding someone to scarf up those scrap pieces.

You could stop right here and you'd have lovely peppermint marshmallows. Perfect for a creamy cup of hot chocolate. I save a few for that. But let's take some to the next level: Chocolate Dipped.


Once the marshmallows have dried and the edges are no longer sticky, toss them around in a strainer, set over a big bowl, to knock off any excess powdered sugar. If there is loose sugar left on then the chocolate won't coat evenly.


Line them up on a silpat mat.

Melt the chocolate and shortening together until smooth and liquid. I have this fancy schmancy chocolate melter thingy but you can use a glass bowl and the microwave. Microwaving and stirring 15-30 seconds at a time until it's melted. Plop a marshmallow into the chocolate.


Quickly flip it over to coat.


And lift it out with a fork. Tap the fork several times on the side of the bowl to knock of any extra chocolate. Then use a skewer to slide it off onto the silpat mat. Sprinkle lightly with any extra leftover crushed candy cane.


Yummy, chocolate dipped, home made, peppermint marshmallows. Great for eating. Great for giving. You're going to love 'em!


Chocolate Covered Peppermint Marshmallows
Adapted from Martha Stewart's "Homemade Marshmallows"

2-1/2 T. unflavored gelatin (approx. 3 envelopes)
1-1/2 C. sugar
1 C. light corn syrup
1/4 t. salt
1T. peppermint extract
4T. crushed candy canes, plus extra for decoration. 
      (approx. 5-6 regular sized candy canes)

3 C. semi-sweet chocolate chips
3 T. vegetable shortening

Powdered sugar for dusting

Set an 8x12-inch pan on a rimmed cookie sheet and dust generously with powdered sugar. Set aside. Combine gelatin and 1/2 cup cold water in the bowl of a stand mixer fitted with the whisk attachment. Let stand 30 minutes.
Combine sugar, corn syrup, salt and another 1/2 cup water in a small heavy saucepan and place over low heat. Stir until sugar has dissolved. Wash down the sides of the pan with a wet pastry brush.
Clip on a candy thermometer and raise the heat to high. Cook without stirring until it reaches 244°F (firm-ball stage). Immediately remove pan from heat.
With mixer on low speed, slowly and carefully pour syrup into the softened gelatin. Increase speed to high and beat until mixture is thickened, white and almost tripled in volume, about 15 minutes. Add peppermint extract, beat to incorporate. Add crushed candy cane pieces and mix briefly to distribute.
Pour mixture into prepared 8x12 pan. Pat smooth with wet hands. Dust with powdered sugar and let stand overnight, uncovered, to dry out.
Turn out onto a cutting board and cut into 1-inch squares and toss in a bowl with more powdered sugar.

Microwave chocolate and shortening on high for 30 seconds. Stir. Continue to microwave, 15 seconds at a time, stirring in between until chocolate is melted. Dip marshmallows in chocolate and sprinkle tops with crushed candy cane.

Makes about 40 marshmallows

Friday, July 22, 2011

The Basics: Marshmallow Dough


I've got a quickie for you this week. And here I am, just under the wire. Again. Another busy busy week. I keep waiting for "things" to slow down but I'm slowly coming to the realization that that may never happen. This is it, the pace of our life. Soon enough I'll be complaining that my children are all grown up so I guess I'll just shut it and enjoy the ride. Wheeeeee!

This week, I've got a super simple. I mean SUPER SIMPLE recipe for you. Two ingredients simple. Some may call it Marshmallow Fondant but I've seen recipes for that and it involves melting marshmallow, adding stuff, mixing, greasing, bla bla bla. Way too much work. I call this "Marshmallow Dough", or "Poor Woman's Fondant". I've used it in place of traditional (i.e. EXPENSIVE) fondant and it works like a dream. I've covered cakes, decorated cookies and sculpted roses. The only difference I've seen between this handy concoction and fondant is the cost (way cheaper) and flavor (way better, tastes like marshmallows). So mix some up and get to experimenting. I'll post later on how to cover cookies so stay tuned.

Here's all you need: 1 jar marshmallow creme (7oz.-ish) and powdered sugar (3-1/2 cups to start and more for kneading and dusting.)

Just dump it in a bowl and start stirring. Takes a bit of elbow grease but keep working it until all the sugar is incorporated. Half way through you'll be convinced that you have too much sugar but KEEP GOING. It will get there. You may have to get your hands in there (dust them with powdered sugar) and knead it, do what ever you have to do, just get all the sugar worked in.

Alternately you can use the dough hook on your mixer. BUT. . .make sure you have a pretty powerful mixer; only use the dough hook, NOT the beater or whip; and watch your mixer close to make sure it's not stressing the motor. If it starts sounding or smelling funny, turn it off IMMEDIATELY! Do not use a hand mixer, you'll burn it out. OK, fair warning.

Half way through it will look crummy, like this. But keep going.

Eventually it will look like this. If you aren't using it right away wrap it tightly in plastic wrap and then in a zipper bag, squeezing out all the air.

I really like this for covering cookies because it's firm enough that you can stack or wrap the cookies but it isn't completely hard when you bite into it. I used it on these cookies adding the detail with royal icing.

And these cookies, possibly the coolest cookies in the universe. I'll show you how I did it later next week. For now, mix up a batch of marshmallow dough and play around.

Marshmallow Dough
1 jar marshmallow cream (7oz.)
3-1/2 C. powdered sugar.

Combine marshmallow cream and sugar in a large bowl stirring until most of the sugar is incorporated. Finish working the sugar in by kneading. Wrap tightly until ready to use.

Tuesday, June 7, 2011

Muddy Buddies®/Puppy Chow

This fun snack goes by a couple of names. Officially it's called Muddy Buddies® but that name is a ® (registered trademark) so I don't think I can call it that. Hmmmm, not sure what the rules are. (Any lawyers out there? Can ya help a girl out?) Only I don't like calling it "Puppy Chow" because it seems to imply that your dog could eat it which is a big NO NO. It has chocolate and will make your pooch pretty sick. Also, we're not dogs (or puppies), so I don't want to eat something called "Puppy Chow". But whatever you want to call it, it's good, kids love it, and as sweet treats go, it's not too bad, us mom types don't have to feel too guilty about serving it. To be honest, I'm not a huge fan, I'm just not that into peanut butter. I don't dislike it, I just don't really like it. Kind of a "take it or leave it" thing. But my kids, their friends, my husband, and most people I know, like it. It's super easy to make and a great recipe for kids to whip up on their own. It has just a few simple ingredients which most likely you already have and doesn't involve the stove top or oven. (Just the microwave) So whatever you want to call it, make up a batch next time you need to feed a crowd. The full recipe can be found on either the Chex or Betty Crocker web sites. Go get it!

You probably have all this in your pantry right now: Chex cereal (any variety, I like the rice), chocolate chips, peanut butter, butter, vanilla and powdered sugar.

Start by measuring out the cereal into a really big bowl.
 Just so's ya know, my 13 year old made this recipe, I just took pictures. 
That's her lovely hand.

Next add the chocolate chips, peanut butter and butter to a microwave safe bowl and microwave on high for 1 minute.

Give it a stir and continue to microwave, 30 seconds at a time, until it's all melted together and smooth.

Add the vanilla and stir in well.

Pour the chocolate-peanut butter mixture over the cereal and mix well. At first it doesn't seem like it will coat all the cereal but just keep gently mixing. (be careful not to crush the cereal). Try to find all those pesky hidden globs of chocolate and get them all mixed in good.

Nice, all coated and ready for more sugar. Yea!

Dump the powdered sugar into a large zipper storage bag. This is a gallon bag but if you have something bigger I recommend it. This bag was a tad small and we had to do then next step in two parts.

In goes the cereal mixture (for us, just half).

Now give it a good shake. Really shake it up baby. 
(OK, sorry that was pretty cheesy but I couldn't resist)

Lastly spread it out on a rimmed cookie sheet and let it dry/set up. Then store in another (clean) zipper bag or other air tight container.

This would be great for a pool party or post soccer/baseball game treat. Here are the recipe links again:  Chex,  Betty Crocker