Thursday, June 2, 2011

Apricot Orange Glazed Chicken


This is one of my husbands favorite dinners and it's so easy. Really, it's so easy you'll end up making it again and again. And then again and when you have guests for dinner you'll make it again. I'm not kidding! It's that good. Really delicious and really easy. Two things I love in a Chicken Dinner. I'm not sure where I got the idea for this but I've been making it a long time. Even before we had kids, that long! And it never fails to impress. So please, if you try one recipe on this blog, try this one.

Here is what you need, just 4 things: your favorite seasoned salt (I usually swear by "Pappy's Low Sodium" but they didn't have any at the store so I tried this one, not a bad second.), a jar of apricot jam or preserves, orange juice and chicken (I like leg quarters but you can use any combination of cut up chicken pieces.). 

Preheat your oven to 425°F. Lay the chicken, skin side up, on a rimmed cookie sheet or roasting pan. I like this "Large Bar Pan" from Pampered Chef. I don't use it often because the feel of stoneware gives me the willies. Like nails on a chalkboard, but for roasting chicken it is awesome, I just use pot holders and try not to touch it. If you need to, trim off the excess fat and skin using kitchen shears.

Sprinkle the chicken generously (both sides) with the seasoned salt. Then turn the preheated oven down to 375°F and roast for 30 minutes. DO NOT turn the chicken.

While the chicken is roasting, heat 1 cup of apricot preserves and 3 tablespoons orange juice in a small sauce pan, over low heat. You don't want to cook or boil the mixture, just get it to melt and mix together.

All melted and ready. Just keep it warm on the stove until you need it.
You can also do this in the microwave.

After 30 minutes, baste the chicken with the apricot orange mixture and put back into the oven for 10 minutes. Then baste again and back in for another 10 minutes.
Total cooking time is 50 minutes at 375°F. Remove from the oven and allow to rest for 10-15 minutes.

For a super easy (and complimentary) side dish, mix up a box of seasoned wild rice mix according to the directions, adding 1 cup of chopped dried fruit at the beginning. It should cook the same amount of time as the rice. This bag of fruit bits is really convenient but just use an assortment of any dried fruit you have on hand.

And there you have it. A super easy, very tasty chicken dinner. You can use this same glaze to cook chicken outside on the grill. It's a nice departure from BBQ Sauce. Enjoy!


Apricot Orange Glazed Chicken
Skin-on assorted chicken pieces 
(approx. 6 servings, a whole cut up fryer works well, or leg quarters)
Seasoned Salt - to taste
1 C. apricot preserves
3 T. orange juice

Preheat oven to 425°F
Trim fat and extra skin from chicken pieces as needed. Season both sides well with seasoned salt and lay skin side up in a shallow roasting pan or rimmed cookie sheet. Turn oven down to 375°F and roast chicken for 30 minutes. Do not turn chicken.
Melt 1 cup apricot preserves with 3 tablespoons orange juice and whisk together. Baste chicken pieces and roast an additional 10 minutes. Baste again and roast another 10 minutes. Remove chicken from oven and let rest 10-15 minutes.
Serves 6

Wednesday, May 25, 2011

The Basics: Marshmallow Buttercream


I'm starting a new section on the blog called "The Basics". These recipes are basic components of larger recipes. An assortment of icings, buttercreams, glazes, fillings, cakes, cookies, etc. that you can use to make all sorts of finished desserts. They won't necessarily leave you with a finished product, although I've been know to consider a bowl of buttercream "dessert", but rather the solid foundation for a spectacular creation. Once you master a few basic recipes the combinations for noteworthy confections are endless. So go forth and create!

The first in this series is Marshmallow Buttercream. Normally I'm not a big fan of butter and powdered sugar based icings/buttercreams. They are boring, gritty, greasy and overly sweet. This recipe, however, is one of the few exceptions.  It is to die for! Very creamy, pretty sweet, surprisingly not sticky and delicious. It's a great alternative to a plain vanilla buttercream without overwhelming the other flavors in your dessert. Kind of "Plain Vanilla Plus". (This recipe and versions of it are all over the web. I can't remember where I got it so my apologies if I don't give credit.) I love it on chocolate cupcakes, it would be great on Hi Hat Cupcakes (Google it.) or as a filling for whoopie pies. Hmmmm, good idea for my next post. I'll work on it.  Sprinkle it with some graham cracker crumbs for a S'more cupcake (top left in photo). Divine!

Here's what you need: butter (I always use unsalted), powdered sugar, vanilla and a 7-8 oz. jar marshmallow cream.

Cream the butter until light and fluffy. Really beat it, you want to get some air in there.

Add the powdered sugar and beat again until fluffy. Scrape the sides down a few times to make sure you get it all mixed in. Then add the vanilla and mix well.

Lastly add the whole jar of marshmallow cream and beat until thoroughly combined, light and fluffy. Really give it a go!

There you have it. Marshmallow Buttercream. Just waintin' for a Chocolate Cupcake to ice or a Whoopie Pie to fill.


Marshmallow Buttercream
1-1/2 sticks (6oz.) unsalted butter at room temperature
1 C. powdered sugar
1/4 t. vanilla
7-8 oz. jar marshmallow cream

Cream butter until light and fluffy. Add sugar and beat until fluffy. Beat in vanilla until incorporated. Add marshmallow cream and beat until thoroughly combined and light and fluffy.

Makes approx. 2 cups
(enough to frost approx. 18 cupcakes or 30-40 mini cupcakes)

Thursday, May 19, 2011

Jam Bars


My apologies for the very very late post this week. We went away for a little adventure in San Francisco this past weekend and I'm spending the remainder of the week playing "catch up" around the house. Laundry, grocery shopping, end-of-school-year general chaos. Just the stuff that seems to consume my life some days. But it's so worth it. To get to escape a little to the big city and have a little fun. What fun we had!

We participated in the "Bay To Breakers" this past weekend. My husband, my 13 year old daughter, my 11 year old son and me. It was crazy! If you don't know what the Bay To Breakers is definitely google it! (Be warned you may get some pictures of people with nuttin' on.) It is the worlds oldest foot race; a 12K (thats 7.3 miles to us non-runner types.) run/walk; a moving party; a freak show. Besides being a race it's a crazy event where people wear costumes and some wear nothing but their birthday suits. Which, by the way, totally grossed-out my kids, as it should have. Its where many let their freak flag fly and oh my, some were mighty freaky! "You won't find a more wretched hive of scum and villany." (name that movie!) So why would an average, suburban, middle class family choose to participate? This year just so happened to be the 100th Anniversary of the race, and there has been talk of canceling it in the future, so I wanted to my kids to do it just once. To participate in something big. Something unlike our controlled suburban environment. To push outside the comfort zone and experience a little "real life". To see the world and humanity on a wider stage, for better or worse. And we saw a lot. Lots of "teaching moments" for our kids. And we did it. We finished. All 7.3 miles of it. Plus the 13 blocks we walked from our hotel to the starting line. Plus the 2 miles we walked back to the Polo Fields to get our t-shirt and finishers medal. Plus the other 15 blocks we walked to catch a ride back to the hotel. Whew! It was a lot of walking!

For a baker, cook and eater, that meant a lot of calories burned. Wahoo! A free pass to eat whatever I want. So of course the night before we went to Cheesecake Factory. And of course we ordered Fired Macaroni and Cheese. . .divine, and pasta. . .delicious and CHEESECAKE. . .out of this world. My son and I are working on a homemade version of the Macaroni and Cheese. Stay tuned. After the race we popped into the nearest smoothie joint. It's a big chain, I'm sure you know the one I'm talking about. I got my usual Peach Pleasure smoothie and then spied a jam bar in the pastry case. I had all those burnt calories to replace so why not. I got a jam bar and. . .meh, it was just OK. Kind of gummy, mushy and soft, like it had been sitting there quite a while. And oh how I love jam bars. It was nothing short of heartbreak. When I got home I couldn't shake the dissappointment of the jam bar. The jam bar had to be redeemed. I went to my trusty recipe binder, got out my trusty jam bar recipe and set to baking. Enjoy!

Here's what you need: flour, baking powder, salt, rolled oats (I like the quick cooking kind for this recipe.), brown sugar, butter, your favorite jam/jelly/preserves, chopped nuts (your choice, I usually use almonds but I didn't have any so I used pecans.).

In a large bowl mix together the flour, baking powder, salt, rolled oats and 
brown sugar.

Toss in the nuts. You can wait and just put the nuts on the top layer but I like them throughout. Your choice.

Cut the butter up into smaller pieces and then blend into the dry ingredients. You can use at pastry blender or do like I do and just use your hands (they're easier). These bars are pretty crumbly, I like them that way but if you prefer that the bar hold together a bit more, just add 2-3 more tablespoons of butter.

This is what it should look like once all the butter is blended in. It will be pretty dry but if you pick some up in your hand and squeeze it should hold together.

Take out roughly 2 cups of the crumb mixture and set aside. Pat the rest into a 13x9 inch pan. Pack it in pretty good and even. Press down HARD.

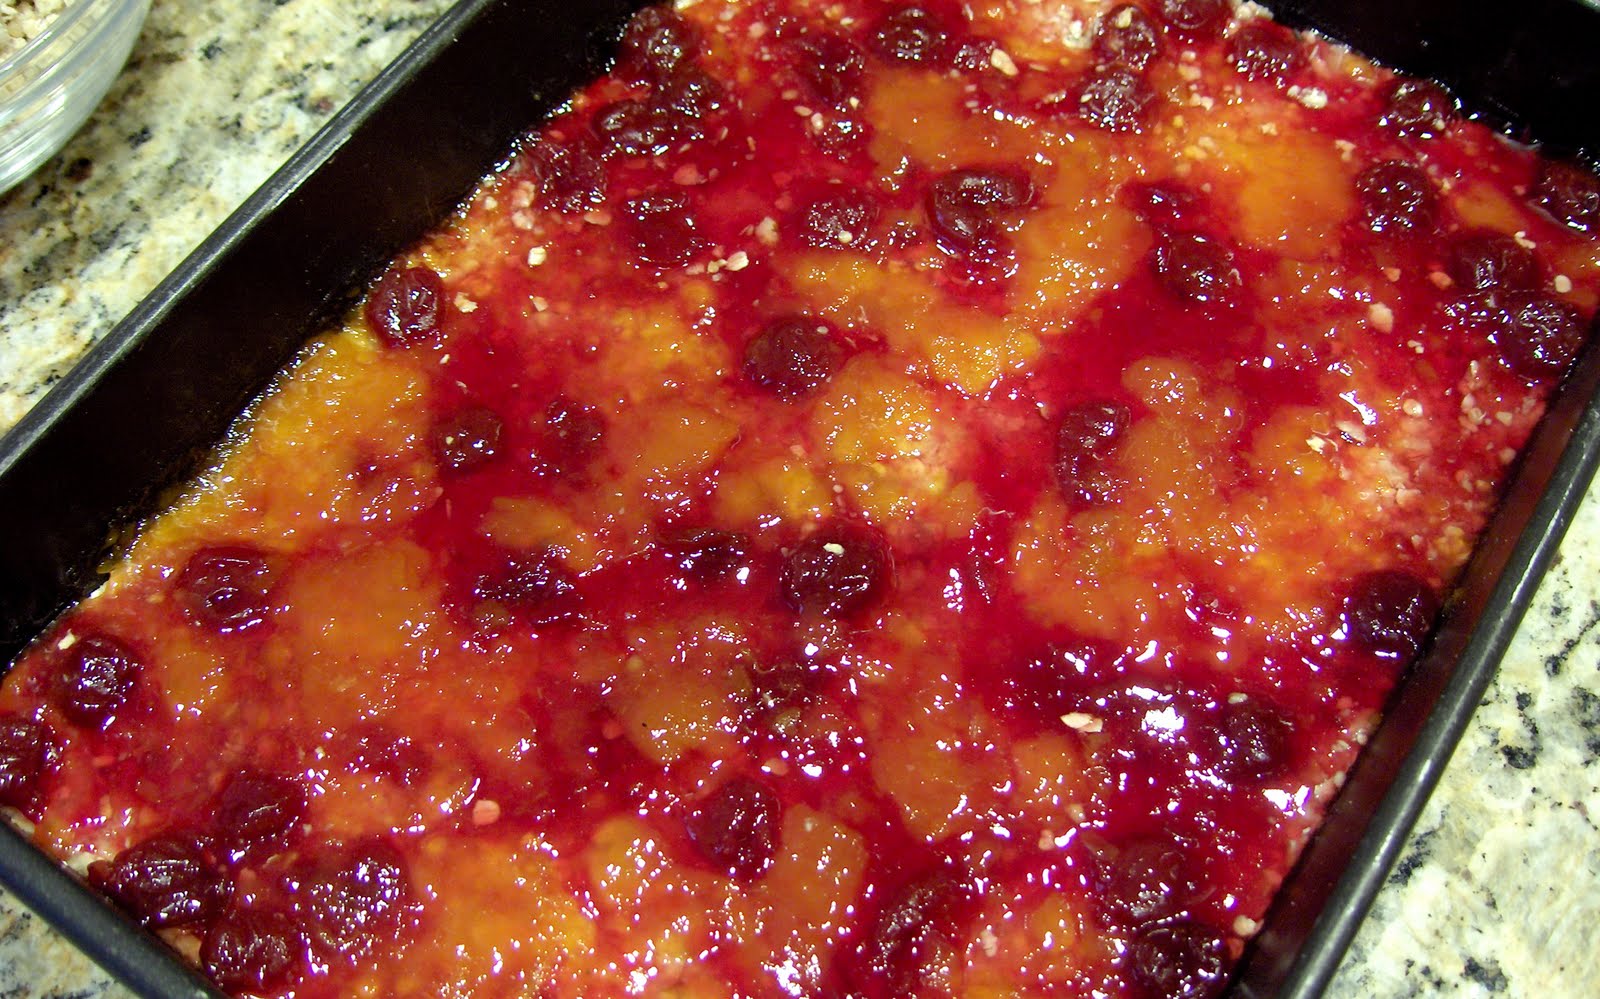
Next spread 2 cups of your favorite jam, jelly or preserves on top of the crust. I was using cherry preserves but didn't have 2 cups, so I used apricot jam to make up the difference. Turned out pretty tasty. Just use what ever flavor combination you like.

Crumble the reserved 2 cups of crumbs on top leaving some gaps. If you didn't add the nuts into the mixture before then just sprinkle them on top. Then into the oven; 350°F; for 25-30 minutes until the top starts to brown.

Cool completely and then cut into squares. Yummy Jam Bars.

Jam Bars
2 C. flour
1-1/2 t. baking powder
1/4 t. salt
2 C. quick cooking rolled oats
1 C. brown sugar
1 C. butter
2 C. jam, jelly or preserves
1/2 C. chopped nuts

Preheat oven to 350°F.
Combine flour, baking powder, salt, rolled oats, brown sugar and nuts*.
Cut in butter until crumbly.
Reserve 2 cups crumbs. Pat remainder of mixture into a 13x9 inch pan.
Spread jam over bottom crust and then top with remaining crumbs.
*Sprinkle with nuts if nuts were not added into crust.
Bake for 25-30 minutes until top starts to brown.
Cool completely before cutting into bars.
Makes approximately 24  2x2 inch bars.


Tuesday, May 10, 2011

Limeade Sparkler

I'm apologizing in advance for all the out-of-focus shots in this post. Not sure what was going on but I just couldn't get it in focus. Maybe it was the glass? The liquid? The lighting? My camera (it's old)? Not sure. I'll have to investigate.


Time to confess. I love Taco Bell's Limeade Sparkler. I find myself sneaking through the drive thru to get one when I'm out and about by myself. It's a bad habit. I know. I just can't help myself. The tangy lime, the sparkly bubbles, the cool clear glass with the two-tone drink. I've been lured in by the marketing, the presentation and the taste. They are just so dang refreshing on a hot day. If you live in my neck of the woods, hot is pretty darn hot: 105, 109, for a couple of weeks each summer. On a day that hot, you just can't drink soda. To thick, to syrupy, to sugary. . .even the diet. That's not to say that I've been cured of my Diet Coke addiction. I know, I know, it's really bad for me. I've tried to kick the habit a bunch of times. Gone as long as 6 months without, but somehow I'm always lured back. It really is my one vice. I don't smoke, I'm not a heavy drinker, I don't tan, we eat a balance healthy diet, etc., etc., etc.. Please forgive me. And please don't tell me how bad they are for me, I KNOW! 

I recently checked out the calorie content of the TB Limeade Sparkler and oh mama, 150 calories for the 16 ounce version. Whoa! I need to slow them down. Can't be chugging too many down without eventually packing on a pound or two. So, I decided to come up with a homemade version. The goal was lower calories, FOR SURE, and definitely bring the cost down, but still with all the flavor. What I've come up with is pretty good. I dare say I like it better than the TB version, but I'll let you be the judge. Enjoy!

It's pretty simple. Here is all you need: Torani Lime Syrup, Club Soda and a lime.

Fill a 12 oz. (1-1/2 cup) glass with ice. Don't pack it in, just fill it up. You could use a bigger glass but you'll have to adjust the syrup and lime.

Pour 1 ounce of lime syrup into the glass.

Cut the lime into quarters. You only need 1/2 a lime per drink so why not make two?

Squeeze the limes into the glass and go ahead and throw them in.

Now just fill the glass up with club soda. It's that easy. Doesn't it look cool with the two-toned drink. Of course you want to stir it up before you drink it, but I like to take a minute to marvel at the presentation. I'm weird like that.

Calories you ask? Not bad: 78. 70 for the ounce of lime syrup and 8 calories for 1/2 lime. Now I can live with that. I'm thinking and adult version might benefit from some rum or vodka but I'll experiment with that another time. 
Stay refreshed!
Becky