

I have a confession to make: I have a crush on Joe Pastry. He's my latest blog crush. It's just a "Blogger Crush", totally anonymous. I mean seriously, I'm a married woman. But I have been stalking his blog for the last month or two and I love it. Totally nuts and bolts pastry making basics. I pretty much want to make everything on his blog. Hey, maybe I could do one of those "Julie and Julia" things and blog about making stuff from his blog. Then someone could blog about reading my blog about making stuff from Joe Pastry's blog. Whoa, whoa, whoa. . .I'm kinda through the looking glass here. Kind of like one of those bathrooms where there is a mirror in front and one in back and you see infinite reflections of yourself. Whoa again, am I making any sense? I think I've had too much coffee today. YIKES! Anywho . . . check out Joe's blog. It has great step by step instructions, with pictures, and recipes for any and all pastry basics.
For my first attempt at one of Joe's recipes I decided to try and make Danish. I love danish, it's my favorite thing from the pastry case. Or should I say, I like good danish. The soggy plastic wrapped blobs from the bread aisle don't cut it. I like buttery, crispy danish. Coconut Custard is my absolute fave but I pretty much like them all, well, except for apple. Don't know why but I just don't really like apple danish. Anywho . . . again . . . boy I'm long winded today . . . check out how I did on my first attempt at a laminated dough . . .

Here are the basics: milk (I like to use whole when baking.), sugar, instant yeast, AP flour, salt, an egg and butter. Yes, a lot of glorious butter.

Using a mixer with the dough hook, combine all the ingredients, except the butter.

Mix about 5 minutes until you have a smooth dough. Don't worry if it's sticky. Let it sit about 30 minutes at room temperature then refrigerate for at least two hours. According to Joe, you can go overnight. I just went the two hours. P.S. I forgot to oil my container before I proofed the dough and it kind of stuck a bit. No big catastrophe, but would have been easier if I had. Don't be like me, oil your container.

While your dough is chillin' in the fridge, make the butter slab. First lay out a double thickness of plastic wrap and sprinkle it with 1 tablespoon of flour. Lay out your butter and sprinkle with another tablespoon of flour.

Cover with another double layer of plastic wrap and, per Joe's instructions, whack it into a butter slab.

Square it off, put the trimmings on top, and whack again. The actual finished size isn't critical it just needs to be square and about 1/2 inch thick. Check Joe's post for more in depth instructions for doing this. You do NOT want the butter to melt! If it starts to get shiny, park it in the fridge for a few minutes. I was doing this on a 90 degree plus day, so I cranked my A/C down to 68, just for good measure.

Once your dough has rested at least two hours, plop (that's a very technical pastry term!) it out on, again, a double layer of plastic wrap that's lightly floured. OK, you know I'm a wax paper gal but seriously the floured, double layer, plastic wrap really made this project much much easier.

Roll it out (or just press with your hands, I did.) into a square that's slightly larger than the butter slab. Then lay your slab diagonal on the dough. Stretch and wrap the dough tightly around the butter slab making it as snug as possible. Again, pop over to Joe's post to see, more in depth, what to do.
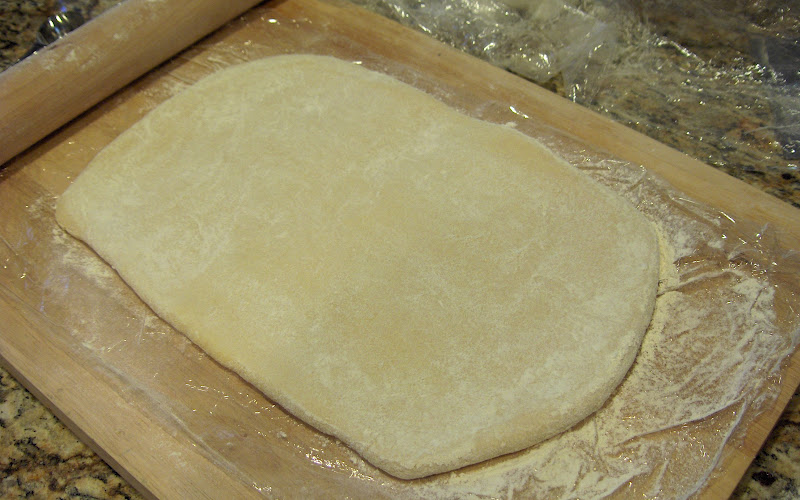
Once the butter is tightly enclosed, roll the dough out into a rectangle that is about twice as long as it is wide.

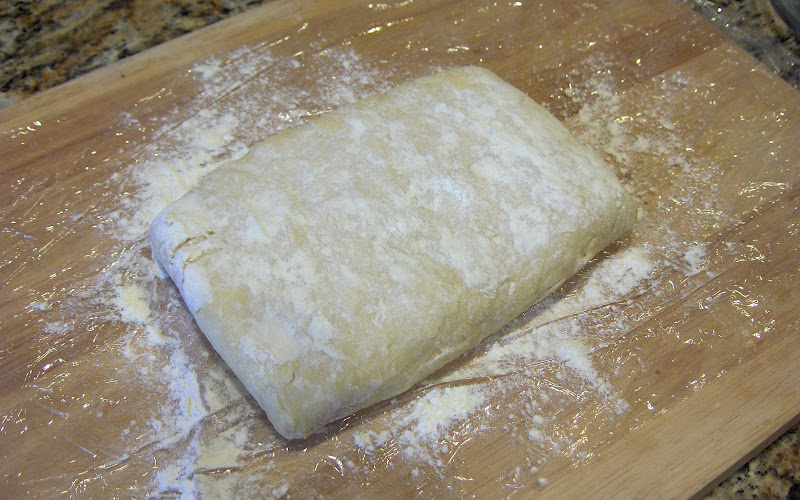
Then fold the ends over, in thirds, like a letter. Wrap up in the plastic wrap and chill in the fridge for 20-30 minutes. You'll then repeat the rolling/folding/chilling process 2 more times. Joe says you can do two "turns" between chills but since it was a hot day, I chilled between each "turn". I didn't want to risk melting the butter and have it absorbed by the flour.
Once you've done three "turns" let the dough chill again before you roll it out.
I let this set overnight in the fridge.

When you're ready to make danish, roll the dough out into a rectangle. Exact size isn't important, it should be about twice as long as it is wide and about 1/4-inch thick. Then cut the dough into 12 strips about 1-inch wide. I used a pizza cutter, it was a snap.

OK, this is the last time I'll send you over to Joe's blog, but he does a great job of demonstrating how to get the danish into this shape. Mine are not as neat as Joe's but not bad for my first try. Once you get all your danish shaped they need to proof. About two hours at room temperature, covered with plastic wrap that's been sprayed with cooking spray. OR. . .

After all the rolling and folding I was a bit impatient to get to the finished danish so I set up this "proofer". Adjust two racks on the top two positions in your oven and another rack on the bottom most position. Put the danish on the top to racks and a pan filled with boiling water on the bottom. Close the over and voila, you have a proofer. Using this method it only took about 1/2 hour for the danish to proof. BUT. . .it got a bit warm and some of the butter melted out from the dough. It didn't ultimately affect the finished danish but I would recommend that if you have the time, go the room temperature route.

Once they are proofed, put a tablespoon of filling (I used apricot jam) in the center. And, if you want shiny danish, brush with a bit of egg wash. I was impatient and didn't need shiny danish so I skipped the egg wash.

Bake them about 15-20 minutes in a 375°F oven for 15-20 minutes until they are crispy and golden brown. Ain't they purdy?!

To finish the danish, make a simple powdered sugar icing. Start with a cup of powdered sugar and whisk in water, a 1/2 teaspoon at a time, until it is just thin enough that the whisk doesn't leave "tracks" in the icing. Better to err on the side of too thick than too thin. If it's too thin, it will run off the danish and leave shiny streaks.
For icing that looks like this, load it into a zipper sandwich bag, or, if you have 'em, a disposable pastry bag. Then snip the tip and drizzle the icing over the danish in long streaks. If you're not in to that, just use a fork or whisk to fling the icing back and forth across the danish. This is easier but messier. You may end up with icing everywhere.
So the verdict on this recipe project was that I liked it. BUT, it is very time consuming, takes the better part of a day from start to finish. For me, making pastry - rolling, folding, flouring - is weirdly therapeutic and I thoroughly enjoyed the process as much as the finished product. The danish tasted great. Vastly superior to the plastic wrapped soggy danish you find in the bread aisle. And, I'd say, they're comparable to what you find in the fresh pastry case at the grocery store. I was a bit disappointed with the fillings I used (low sugar, organic, apricot and strawberry fruit spread) and next time I think I'll try custard or lemon curd. I will definitely make this again and can't wait to try Bear Claws and Cheese Pockets with the same dough.
Here are the links if you want to give it a try:
No comments:
Post a Comment